29 Dec

Hello,
In this tutorial, we are going to make a speedometer using Arduino.
Hardware Required
Software Required
Circuit Diagram
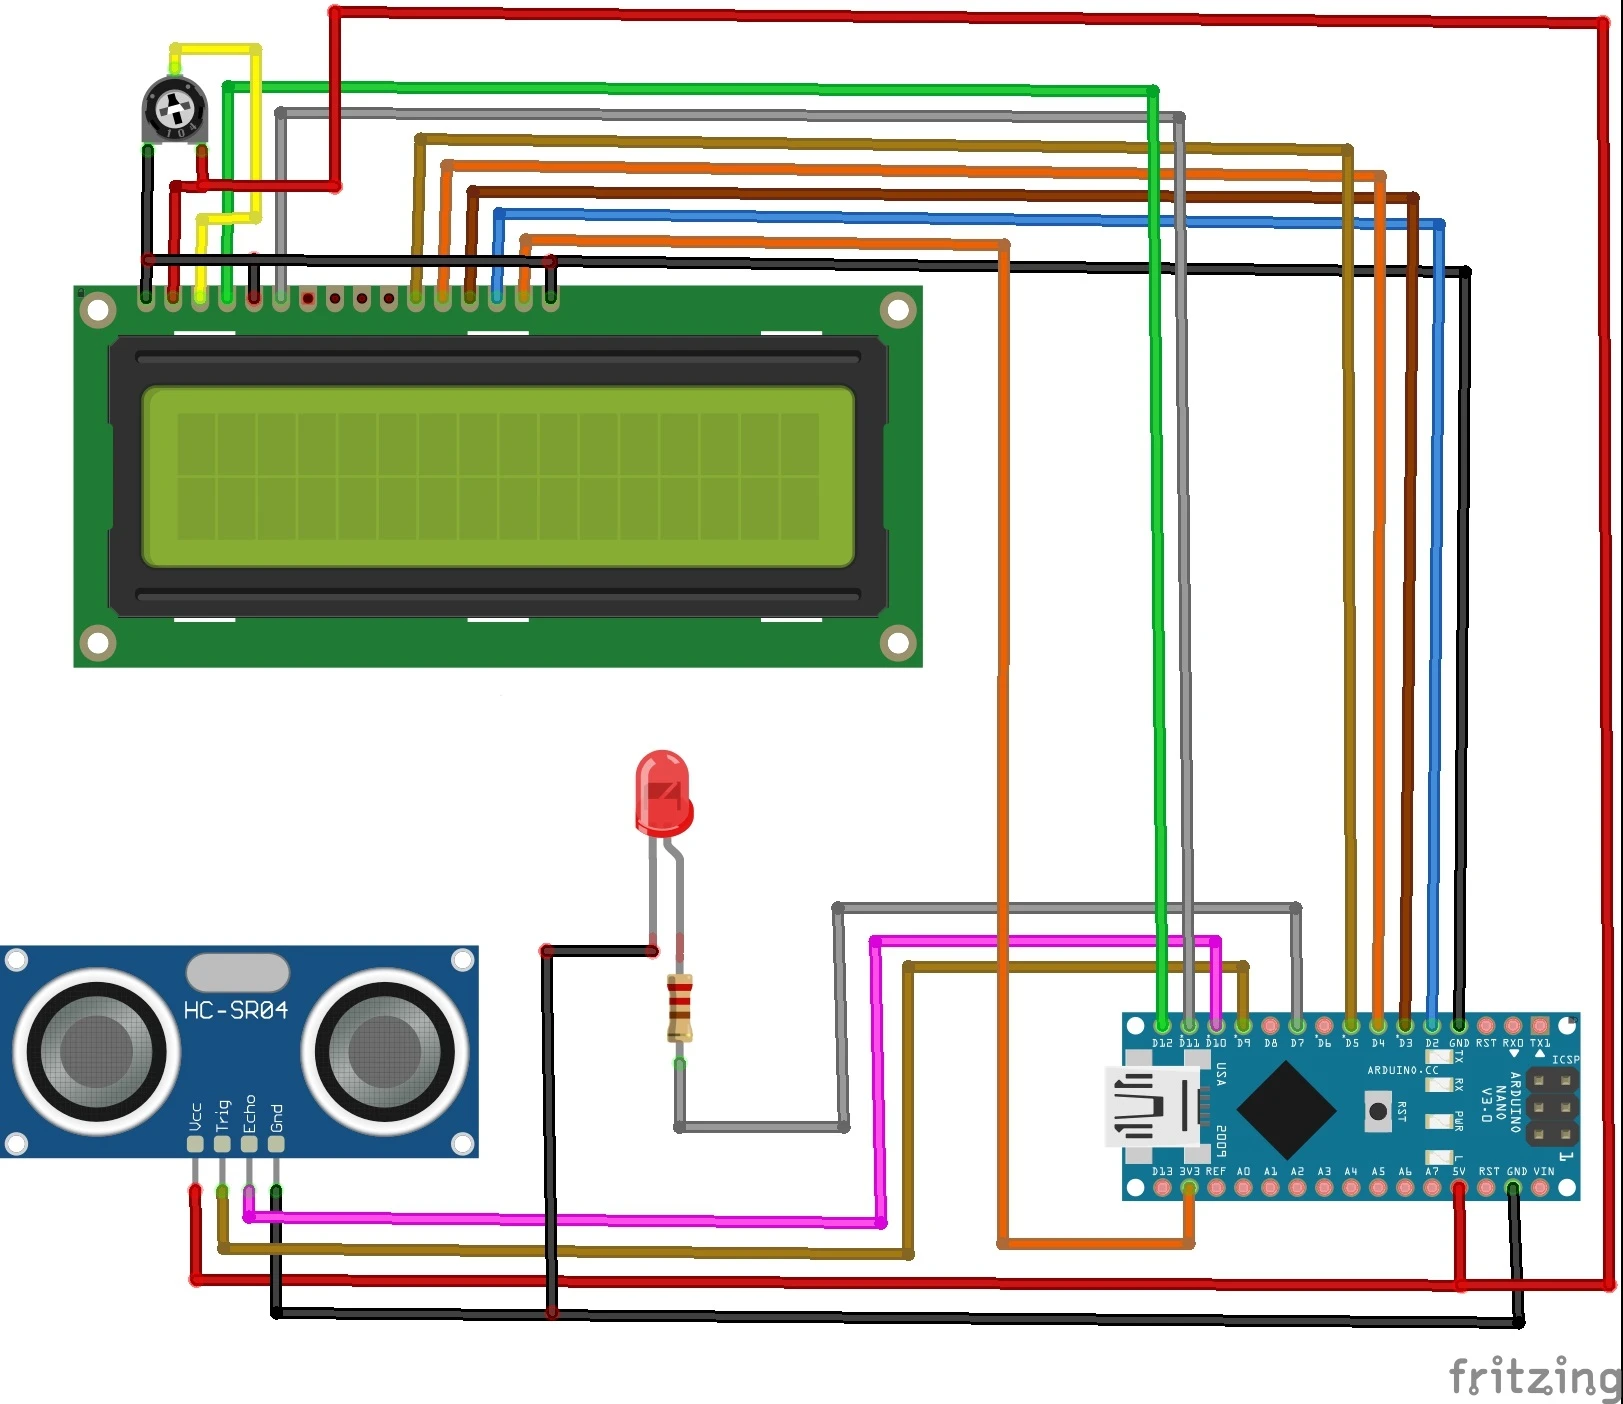
- The anode pin is connected to 3.3V on the Arduino and the cathode pin is connected to the GND pin.
- The four data pins of the LCD are connected to the digital pins 2 to 5 of the Arduino board.
- The Vo pin is connected to the power supply of the LCD via a potentiometer to control the contrast and brightness of the LCD.
- Register pin (RS) is connected to the digital pin 12 or Arduino.
- The R/W pin is to be set to low as LCD is the output device here. So we will connect this pin to the GND on the Arduino.
- The enable pin is used to enable the LCD. This pin is connected to the digital pin 11 on the Arduino board.
- The VCC and GND pins of the Sensor are connected to 5V and GND respectively.
- The TRIG pin is connected to digital pin 9.
- The ECHO pin is connected to digital pin 10.
Working concept
- The working concept of this project is very simple and consists of three main components: the LCD, ultrasonic sensor and the Arduino.
- The unit used in this project for speed is cm/s.
- The ultrasonic sensor takes reading every second. Let us consider the distance at first second distance1 and the distance after that to be distance 2.
- So the speed can be calculated by subtracting the distances after each second.
Speed = |distance1 - distance2|
- We used the modulus sign so that the speed stays positive when the object is coming close or going away.
Arduino Code
- Upload the code to the Arduino board.
- You can use whichever case you want. Make it out of cardboard or any other material. You can even make your own design and 3D print the case.

Hot
-59 %
The Arduino Uno R3 Compatible board is an electronic hardware device used to build and program electronic circuits and projects. The board is based on..
₹528 ₹1,299

-8 %
This HC-SR04-Ultrasonic Distance Measuring Sensor is a very popular sensor which is found in many applications where it requires to measure distance a..
₹82 ₹89

-64 %
If you want to add some visual output to your Arduino projects, you’ll need a display. If you need only a little to display, the LCD1602 Parallel LCD ..
₹108 ₹299

This is 40pcs of each (40 M-M, 40 M-F, 40 F-F) jumper cable Dupont wire for Arduino.
Specifications:
This is 40 pcs of each (total 120 pcs)..
₹159

Leave a Comment