
In this tutorial, we are going to learn in detail about Arduino Uno how to upload the code to Arduino via Arduino IDE. We will also look at some of the errors people face when uploading code to Arduino and provide different kinds of solutions to solve the issue
The architecture of Arduino Uno
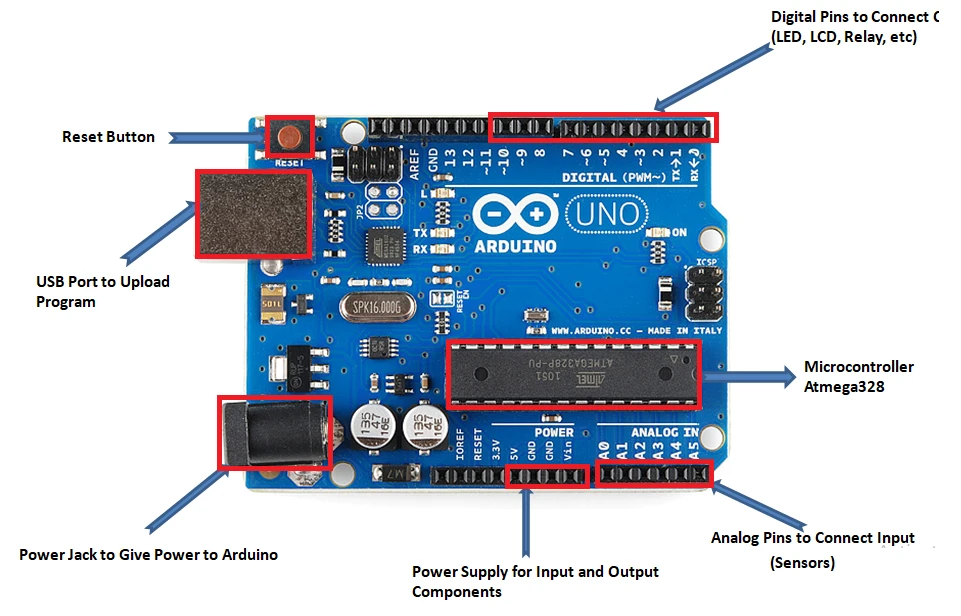
- Arduino Uno is an open-source microcontroller board based on the processor ATmega328P. There are 14 digital I/O pins, 6 analog inputs, a USB connection, a power jack, an ICSP header, and a reset button. It contains all the necessary modules needed to support the microcontroller. Just plug it into a computer with a USB cable or power it with an adapter to get started. You can experiment with your Arduino without worrying too much about it. In the event of a worst-case scenario, you could buy a new one as the Uno is very economical compared to other boards like raspberry pi, STM, etc.
The hardware structure of Arduino Uno
- Microcontroller
- 14 Digital Pin
- 6 Analog Pins
- Power Supply
- Power Jack
- USB Port
- Reset Button
Microcontroller: Microcontroller is the central processing unit of Arduino Uno.
Digital Pins: There are 14 digital pins on Arduino Uno which can be connected to components like LED, LCD, etc.
Analog Pins: There are 6 analog pins on the Uno. These pins are generally used to connect sensors because all the sensors generally have analog values. Most of the input components are connected here.
Power Supply: The power supply pins are IOREF, GND, 3.3V, 5V, Vin are used to connecting sensors because all the sensors generally have analog values. Most of the input components are connected here.
Power Jack: Uno board can be powered both by external supply and via USB cable.
USB Port: This port function is to program the board or to upload the program. The program can be uploaded to the board with the help of Arduino IDE and USB cable.
Reset Button: This is used to restart the uploaded program.
How to Download the Arduino IDE
- The Arduino software or the Arduino IDE can be downloaded either via Arduino official site or you can download the latest version here. There are two ways to install IDE. One is via automatic installer which is a .exe file another is via zip files. We suggest you install the Arduino IDE via the installer as it automatically installs all the required drivers to run. In zip files, you will have to install everything manually. After the download, please allow automatic driver installation and give administrative permissions if required.
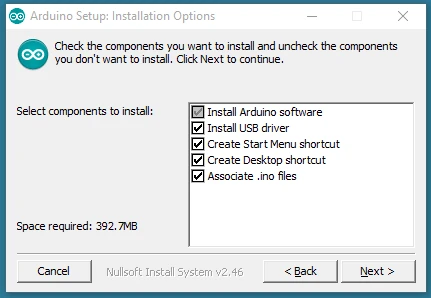
- Choose which parts you want to install. (recommendation default selection)
- Select the folder in which you want to install

How to upload code to Arduino board from Software (IDE)
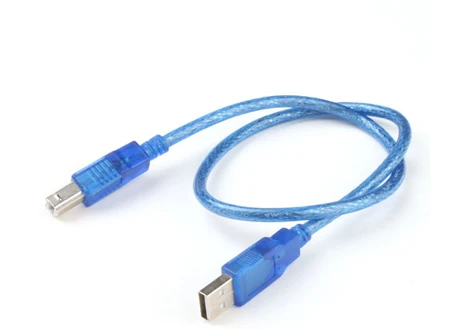
- Connect your Arduino to the computer via USB cable.
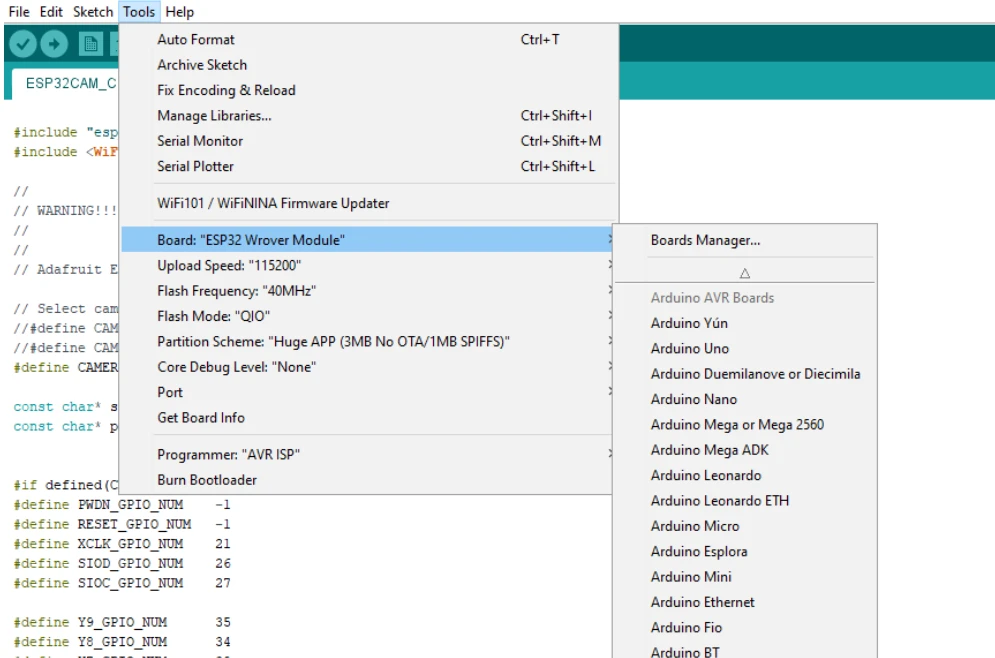
The end of the USB cable which is a USB type B 2.0 connects to your Arduino and the USB type A 2.0 connects to a USB port on your computer. - Choose Tools→Board→Arduino Uno to find your Arduino board in the menu.
You can find all Arduino boards in this menu, such as the Arduino MEGA 2560 and Arduino Leonardo. - Select the proper serial port for your USB cable.
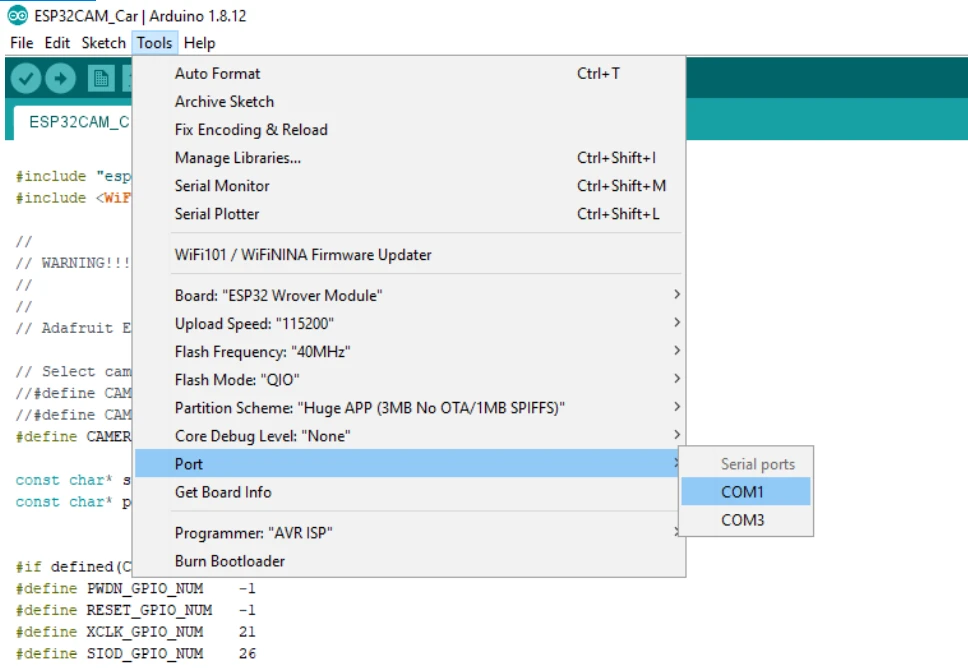
You can easily find the serial port by going to Tools→Serial Port→ com port. X is a randomly assigned number. In a Windows PC, if you have just connected your Arduino, the COM port will normally be the highest number, such as com 3 or com 15 etc. if you are connecting many devices to your computer use then your next com port for that device will be higher. - Click the Upload button.
This button is located on the upper left side. You can also use the keyboard shortcut Ctrl+U for Windows or Cmd+U for Mac OS X.
How to fix upload problems with Arduino
Step 1: Make sure you have selected the right Arduino board
Step 2: Uninstall third-party firewall and antivirus apps
- There is some third-party firewall software that blocks the serial connection, you may have to uninstall those third-party firewall apps. To do this, open the Run by pressing Windows + R key on your keyboard.
- Enter appwiz.cpl in the text box to open the programs and features window.
- Search for any third-party firewall or antivirus and uninstall them.
- Choose the Uninstall option, click yes to confirm if the dialog box appears.
Step 3: Make sure you have selected to right COM port
- You’ll also need to have the right port to upload programs. Click Tools to open that menu.
- Select Ports to open the submenu below.
- Now select the correct COM port for your Arduino board. Usually.
Step 4: Try connecting the board with another USB cable
- To successfully upload the code to an Arduino board, the USB cable must allow serial communication. For example, charging cables do not allow serial communication. So a charging cable cannot be used to upload the code to an Arduino board. Charging + data transfer cable is required to upload code.
Step 5: Unplug all the pins from the board
- Some users have been told that unplugging all the pins from the Arduino board solves the issue of upload errors. There is no way to understand fully why that happens but a lot of people have reported the same solution. Especially with the HC-05 Bluetooth module. The code cannot be uploaded when the Tx and Rx pins are connected to the Arduino board. that One must unplug those pins in order to upload the code successfully.
Step 6: Install all the Arduino drivers
- Program upload errors can arise when there is a problem with the drivers. If a driver is not installed then problems may occur during the uploading of code.
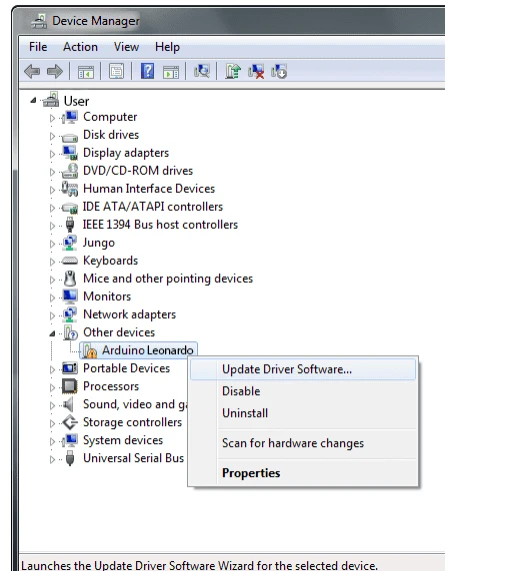
- Open run by pressing windows + R key and type devmgmt.msc, and press the OK button.
- Click Other devices to expand that category.
- Under the other devices section, If there’s an exclamation mark for your Arduino device, then right-click on it and select Update driver software.
- There will be a Browse my computer for driver option. Select it.
- Click the Browse button.
- Click the Next button to proceed.
- Click the Continue Anyway button.
Step 7: Reset the Arduino board
-
If nothing works, then finally try to reset the Arduino board. There is a red button situated right beside the USB port. When you press that switch, the yellow LED light on the board should blink. If the board is not resetting even after pressing the reset button a couple of times, then you might need to burn the bootloader to it. The Bootloader page on the official Arduino website gives further details for how users can do that.
-
These are some of the solutions to various different kinds of uploading errors on Arduino Uno. Users who have fixed other Arduino errors with alternate solutions are welcome to specify what issue they had and what solution worked for them in the comments section below.


Leave a Comment