-1060x400h.webp "Eye blink sensing system")
Hello,
In this tutorial, we are going to learn how to make an eye blink sensor using Arduino.
Hardware Required
Software Required
Eyeblink Sensor

-
The eye blink sensor is an infrared sensor. It contains two parts. A transmitter and a receiver. The transmitter continuously emits infrared waves onto the eye. While the receiver continuously looks for variations in the reflected waves which indicates that the eye has blinked.
-
If the eye is closed that means it will give high output. If the eye is open then it will give a low output.
-
This sensor can be used in a very different variety of robotics and mechatronics projects as it provides excellent results and is very economical.
Assembly of the glasses
-
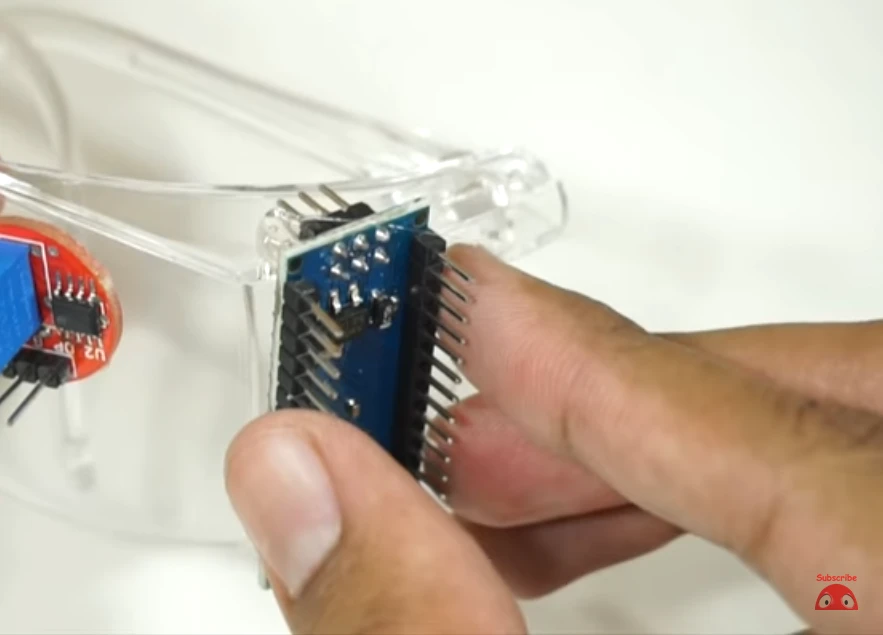
Firstly, stick the Arduino Nano onto the glasses with the help of the glue gun.
-
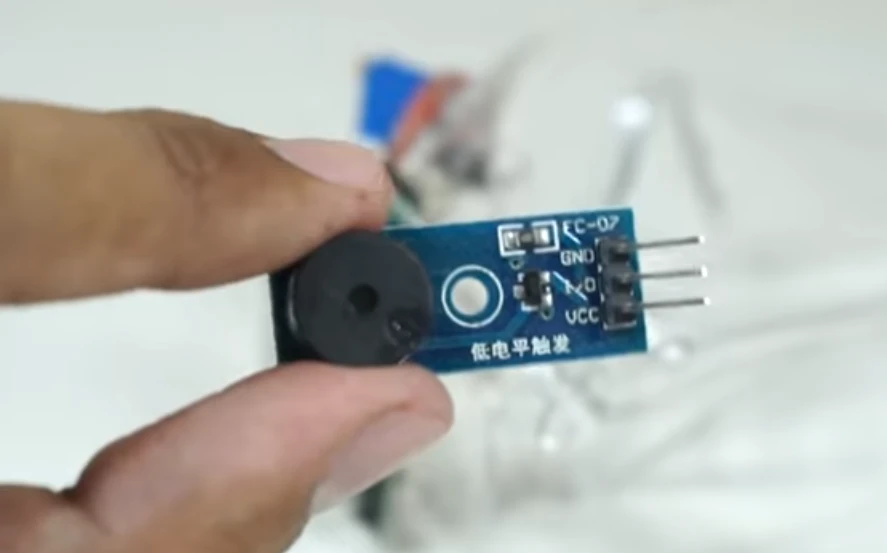
Stick the buzzer onto the glasses.
-
Connect the VCC to the Arduino Nano 5V pin.
-
Connect the GND pin to the GND pin on Arduino.
-
Connect the signal pin of the buzzer to the Arduino digital pin 2.
-
Stick the 9V battery to the other side of the glasses.
-
Connect the negative terminal of the battery to the GND pin on Arduino.
-
Connect the positive terminal of the battery to the VCC pin on Arduino.
-
Add a switch between the power supply and Arduino.

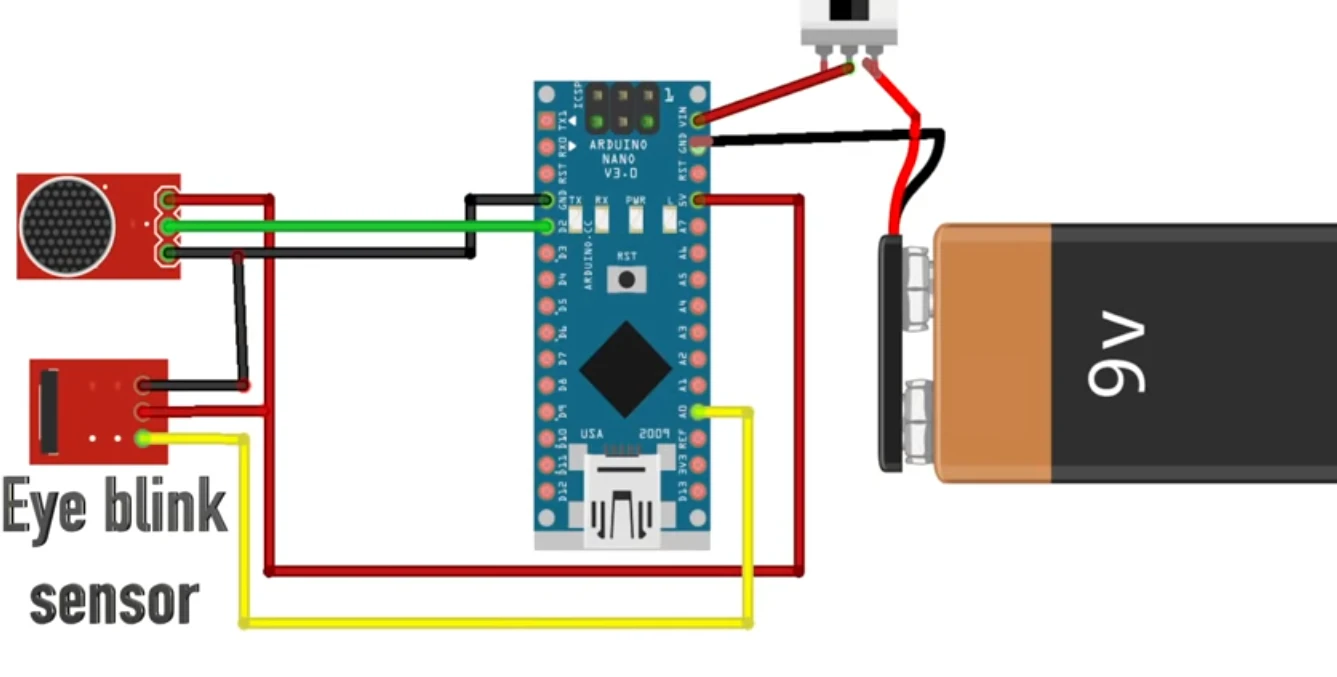
Circuit Diagram
|
Pins on the eye blink sensor |
Pins on Arduino Nano |
|
VCC |
5V |
|
GND |
GND |
|
Output Pin |
D0 |
Working principle of the eye blink sensing system
-
The eye blinking system can be used for different purposes. First, let's look at the blink sensing system.
-
The eye blink sensor constantly sends infrared waves which are reflected and detected by the receiver. As soon as the eye blinks, the output of the sensor goes high. This output is sent to the Arduino board.
-
The Arduino sends the signal to the buzzer to make the noise. In this way, a blink is detected.
-
Another purpose for which this system can be used is called the driver drowsiness system. This system can be used to check if the driver might sleep during driving. This can be done with some minor changes in the Arduino code.
-
Instead of detecting blinks, the Arduino should give the command to buzz when the eyes of the driver are closed for more than 2-3 seconds depending upon your preference.
-
This system can be used with all modes of transports be it trains, ships, planes, cars, etc. This can be very useful to avoid accidents.
-
Another purpose of this system, it can be used in hospitals to check when patients gain consciousness. A patient when unconscious, has the eyes closed. So whenever they open their eyes, the buzzing sound can inform the nurse that the patient is awake.
-
This can also be done with the help of some minor tweaks in the Arduino code.
-
The output of the sensor has to be constantly high in this case as the patient is unconscious. When the output goes low i.e. when the eyes of the patient open, that is when the Arduino should command the buzzer to ring.
-
This works best for patients who are in a coma. The nurses can be easily informed with the help of this system.
Applications of eye blink sensor
-
It can be used to count the blinking of a person.
-
It can be used to keep a check on the driver and make sure he/she is not drowsy. This can help avoid a lot of accidents.
-
It can be used to know when a patient is awake or conscious.
Arduino Code
-
The Arduino codes for this project can be downloaded here.
-
Install required libraries and upload the code to Arduino.
Now your Eye blink sensing system is ready to use.


3 Comment(s)
Your Share Arduino coding in my email
Which library are you using
Please send how to connect the wires in video
Leave a Comment