-1060x400h.webp "How to make a range finder using Arduino")
Hello
In this tutorial, we are going to learn how to make a Range finder using Arduino Uno and an Ultrasonic sensor.
Hardware Required
Software Required
Working principle of SONAR
-
This device uses the SONAR technique to measure the distance of the object in front of it.
-
SONAR (sound navigation and ranging) is very similar to the RADAR system. In both of the systems, the detection is based on the propagation of waves between the target and detector. There are two types of sonar systems, first is active sonar systems. Here the wave propagates from the transmitter to the target and back to the receiver, which is similar to pulse-echo radar. Then there are passive sonar systems. Here the target is the source of the energy which propagates to the receiver, which is similar to passive infrared detection. There is, however, a fundamental difference between sonar and radar systems. The energy transferred by acoustic waves is propagating in the water.
.webp)
The working concept of the Distance measuring machine
-
There are 4 main components to this project. The ultrasonic sensor, The LCD, laser, and the power supply.
-
The HC-SR04 Ultrasonic Sensor is used for detecting obstacles and also for detecting the distance to an object using sonar. It is ideal for obstacle-avoiding projects as it can measure if there is an object and how far it is so that it can successfully avoid that object.
-
The ultrasonic sensor HC-SR04 measures the distance from the object using the sonar principle.
-
Then it sends the data in form of electrical signals to the Arduino board. This is all done with the help of the program written in the Arduino IDE.
-
The Arduino then forwards the data to the LCD where it is shown to the user.
-
The main purpose of attaching the laser is to point out from which point the distance is being measured.
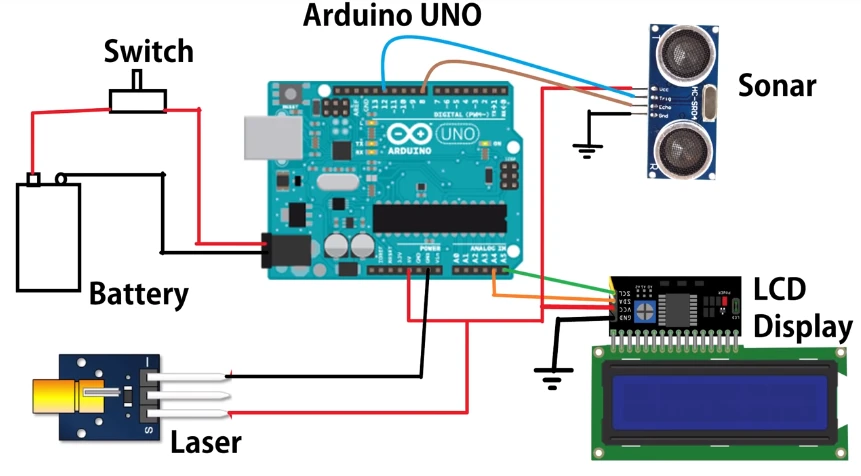
Circuit Diagram
-
The circuit diagram for the range finder is shown below.
|
Pins on I2C Display |
Pins on Arduino Uno |
|
VCC |
5V |
|
GND |
GND |
|
SCL |
A5 |
|
SDA |
A4 |
|
Pins on HC-SR04 Ultrasonic sensor |
Pins on Arduino Uno |
|
VCC |
5V |
|
Trig |
12 |
|
Echo |
8 |
|
GND |
GND |
-
The 9V power supply is connected directly to the power adapter port given on the Arduino.
-
The positive and negative terminals on the laser are connected to the 5V and GND of the Arduino Uno respectively.
-
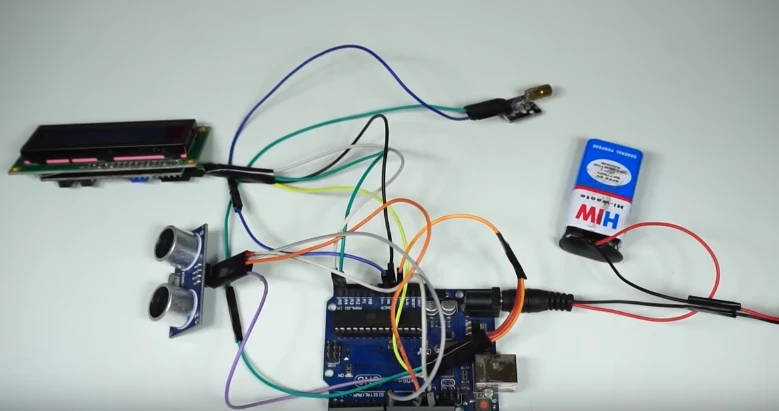
The real-life circuit connections are shown below:
Arduino Code
-
The code for this project can be downloaded here. Download the code text file. Copy and paste it into your Arduino IDE. Install the required libraries for this project.
-
Upload the code to your Arduino board.

Case design
-
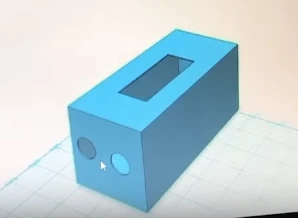
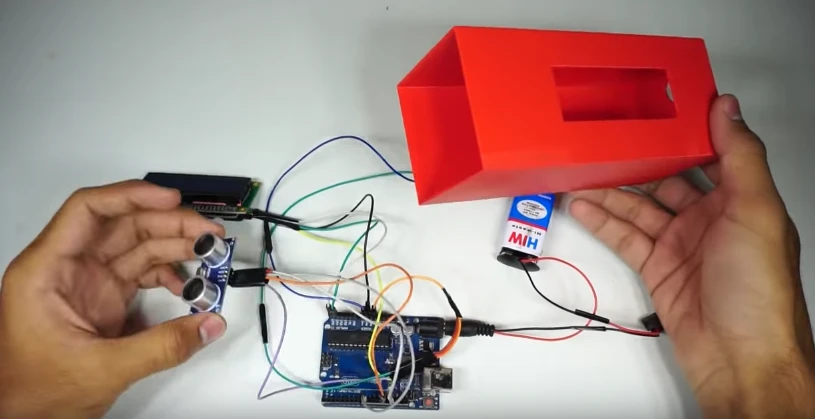
You can put all the assembly done inside a case which we have designed. It is not very complicated. It is just a box in which we have provided outlets for ultrasonic sensor and laser pointer on the front and an outlet for the LCD on the top where the measured distance is being shown.
-
You can also download the .stl files of our design which can be 3D printed from here.
-
When your case is printed, you can stick the Arduino board inside it with the help of glue or double-sided tape.
Now your Range finder using an Ultrasonic sensor and Arduino is ready to go!


Leave a Comment