10 Dec
-1060x400h.webp "Car parking system")
Hello,
In this tutorial, we are going to make a car parking system using Arduino.
Hardware Required
Software Required
- Car parking systems are very common and useful these days as the number of cars on the road is increasing daily. Car parking systems are getting smarter day by day. With automated gates and even keeping a count of how many spots are left inside the parking.
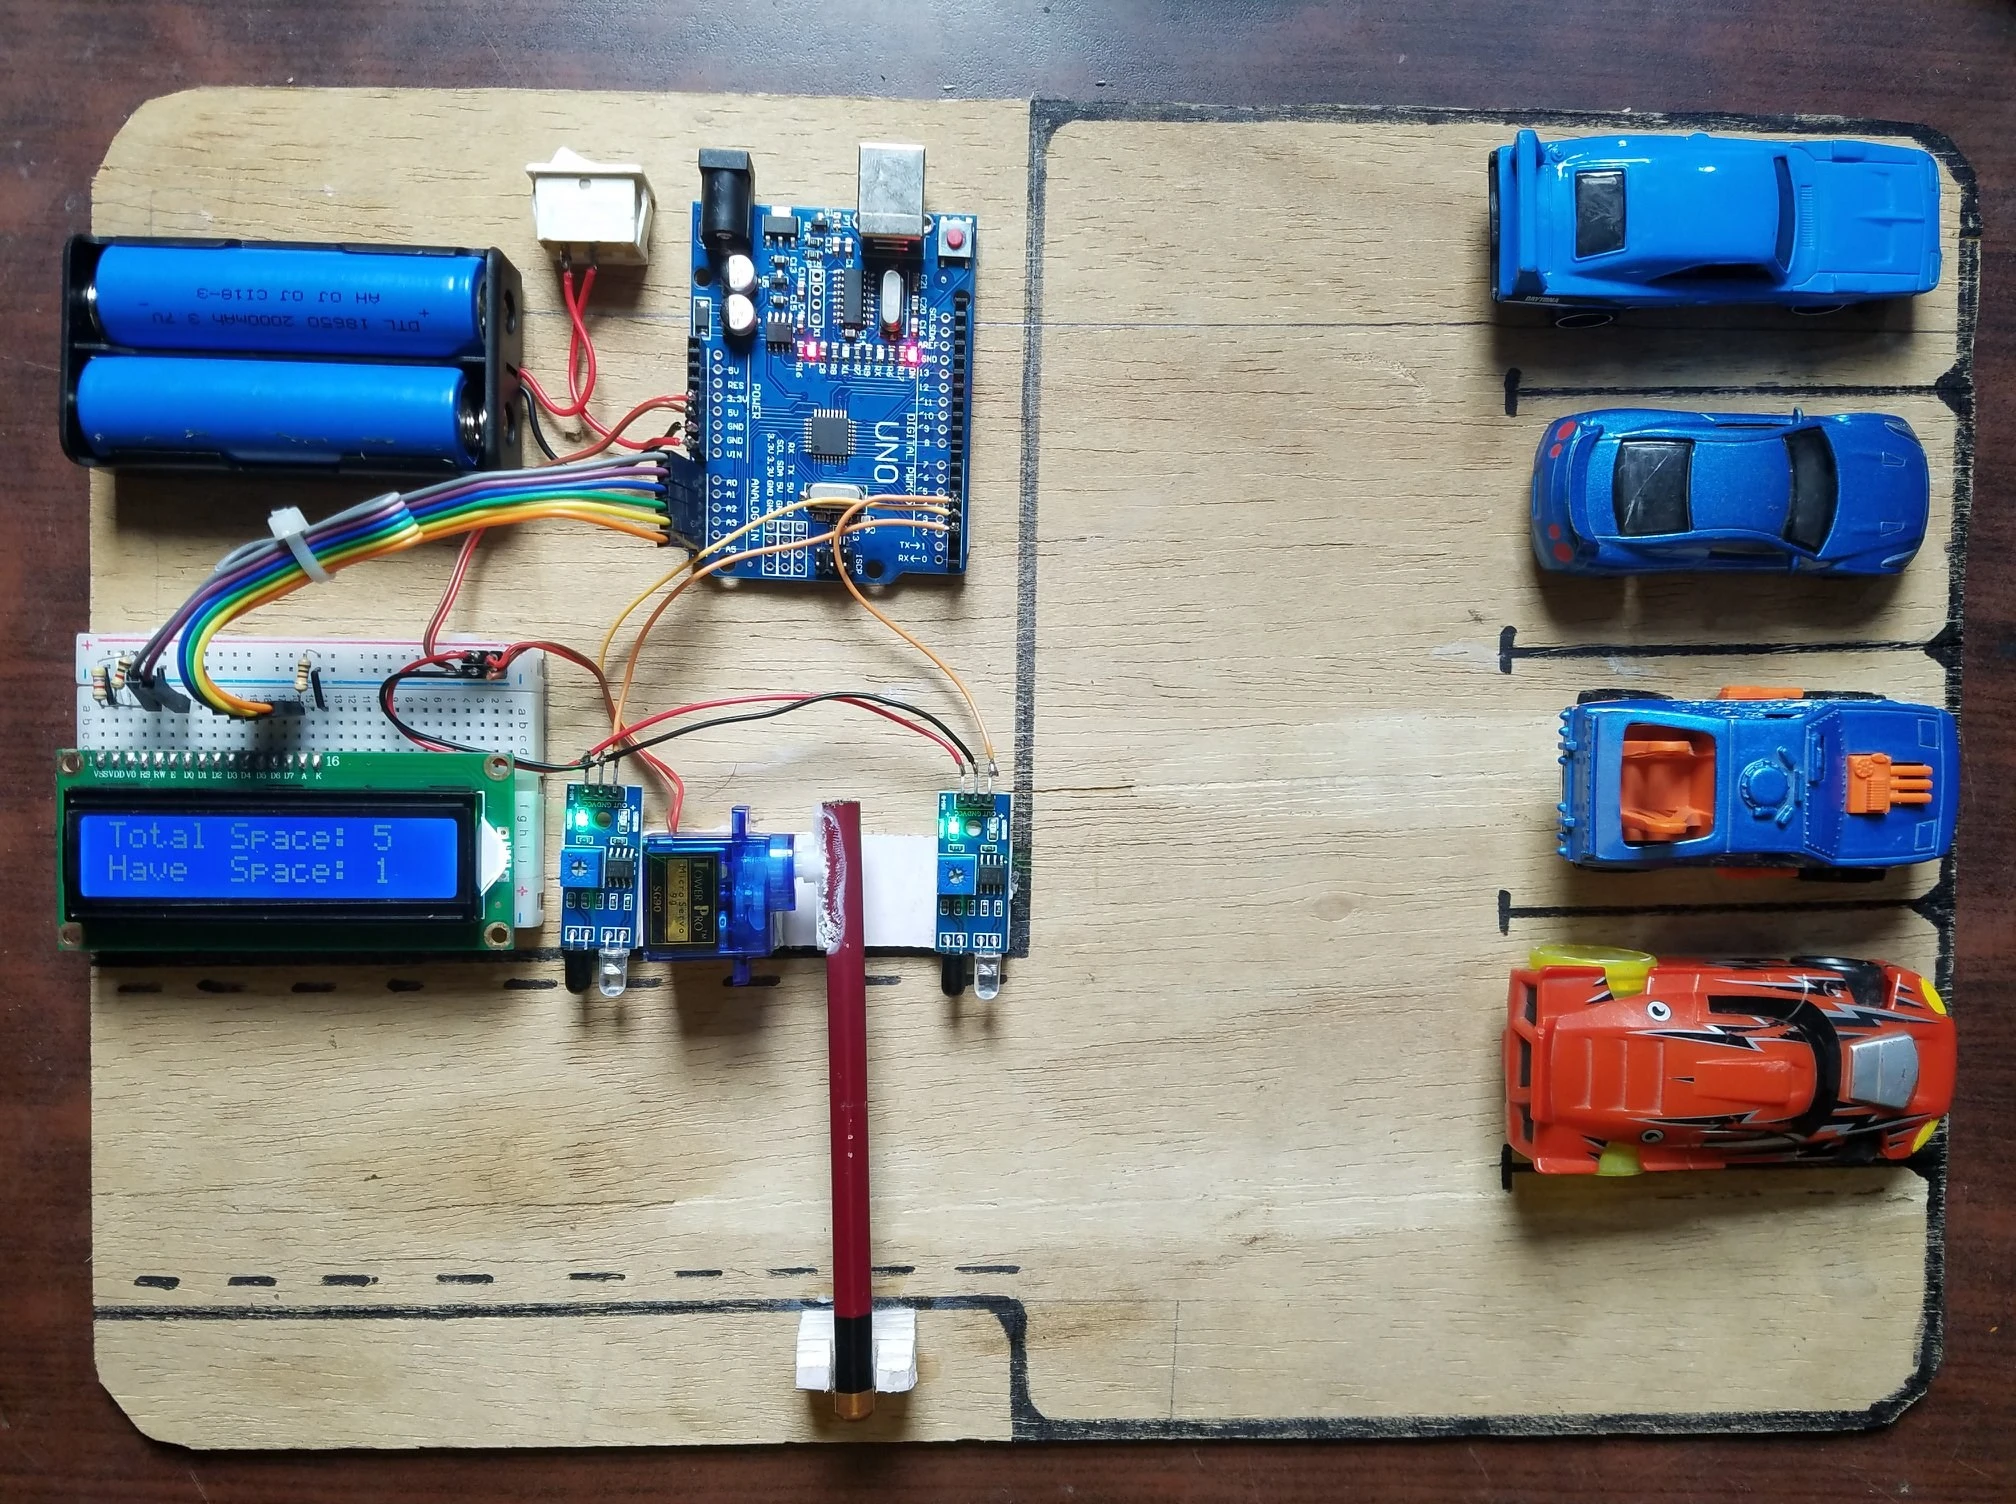
- In this project, we are going to create a smaller version of such car parking. This parking will be fully automated. It will open and close the gate when the car crosses the entrance.
Circuit Diagram
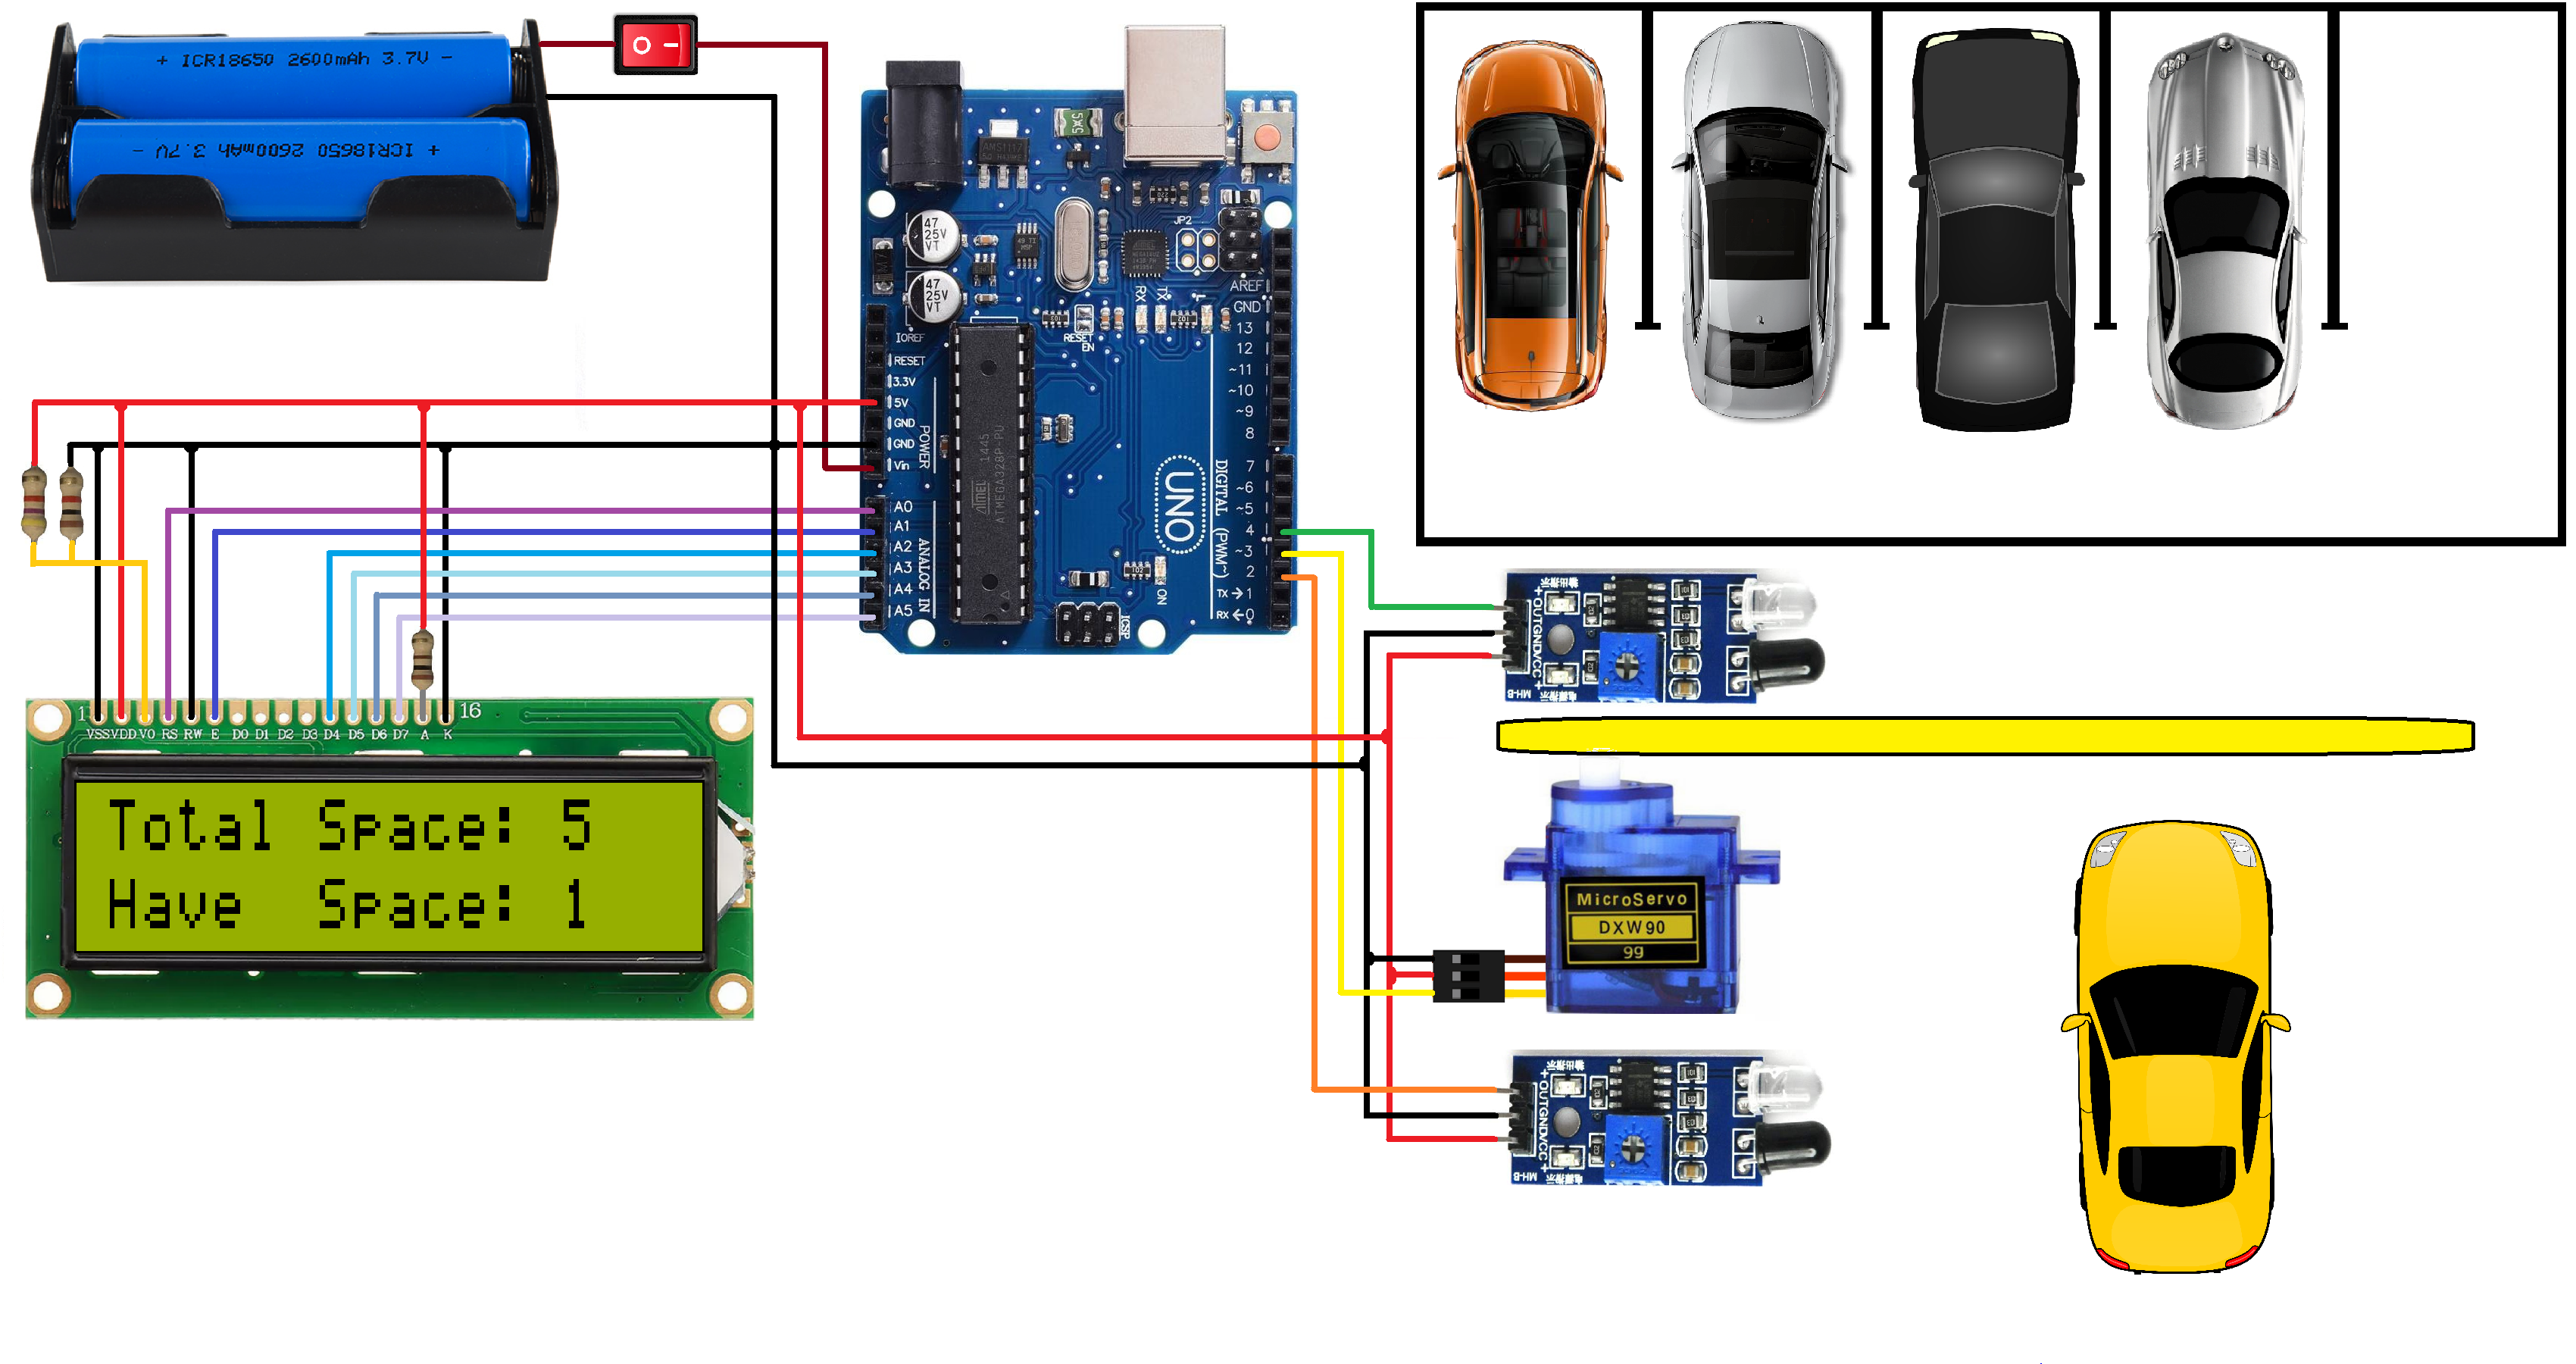
- The circuit diagram for this project is pretty simple.
|
Pins on LCD |
Pins on Arduino Uno |
|
VSS |
GND |
|
VDD |
5V |
|
V0 |
GND |
|
RS |
A0 |
|
RW |
GND |
|
E |
A1 |
|
DATA (D4-D7) |
A2-A5 |
|
A |
5V |
|
K |
GND |
- The Signal pins of both IR Sensors are connected to the Arduino Digital Pins 2 and 4.
- The Signal Pin of the Servo is connected to the digital pin 3.
- Connect the positive terminal of the power supply to VIN on the Arduino and the negative terminal to GND.
- This completes the circuit diagram for the car parking system.
Working Principle
- The working concept of this involves 4 components: IR Sensor, Arduino board, Servo motors, and the LCD Display.
- The IR sensors are continuously scanning both sides of the crossing for cars so they can give an alert when the car is either coming or leaving.
- As soon as the car approaches a crossing from either side the command is sent to the Arduino board. The Arduino board upon receiving the command gives out the signal to the servo to open the crossing.
- The Arduino then gives out the command to LCD Display to either increase or decrease the number of empty spaces.
- The whole process gets started again. This completes the working concept of this project.
Arduino Code
#include
LiquidCrystal lcd(A0, A1, A2, A3, A4, A5);
#include

Servo myservo1;

int ir_s1 = 2;
int ir_s2 = 4;

int Total = 5;
int Space;

int flag1 = 0;
int flag2 = 0;

void setup() {
pinMode(ir_s1, INPUT);
pinMode(ir_s2, INPUT);

myservo1.attach(3);
myservo1.write(100);

lcd.begin(16, 2);
lcd.setCursor (0,0);
lcd.print("  Car  Parking  ");
lcd.setCursor (0,1);
lcd.print("     System     ");
delay (2000);
lcd.clear();

Space = Total;
}

void loop(){

if(digitalRead (ir_s1) == LOW && flag1==0){
if(Space>0){flag1=1;
if(flag2==0){myservo1.write(0); Space = Space-1;}
}else{
lcd.setCursor (0,0);
lcd.print(" Sorry not Space ");
lcd.setCursor (0,1);
lcd.print("    Available    ");
delay (1000);
lcd.clear();
}
}

if(digitalRead (ir_s2) == LOW && flag2==0){flag2=1;
if(flag1==0){myservo1.write(0); Space = Space+1;}
}

if(flag1==1 && flag2==1){
delay (1000);
myservo1.write(100);
flag1=0, flag2=0;
}

lcd.setCursor (0,0);
lcd.print("Total Space: ");
lcd.print(Total);

lcd.setCursor (0,1);
lcd.print("Have  Space: ");
lcd.print(Space);
}
- Upload the code to the Arduino board. Perform the Circuit diagram.
- Although this is a very small-scale model, a concept like this can be implemented very easily on a large-scale parking lot. This would make the process of managing a parking lot very easy.
Now your car parking system is ready for use.

Hot
-59 %
The Arduino Uno R3 Compatible board is an electronic hardware device used to build and program electronic circuits and projects. The board is based on..
₹528 ₹1,299

-59 %
The sensor module light is adaptable to the environment, with a working voltage of 3.3 V to 5 V. It has a pair of infrared transmitting and receiving ..
₹28 ₹69

-64 %
If you want to add some visual output to your Arduino projects, you’ll need a display. If you need only a little to display, the LCD1602 Parallel LCD ..
₹108 ₹299

-17 %
The Micro Servo 9G is lightweight, high-quality and lightning-fast. The servo is designed to work with almost all the radio control systems. It is wit..
₹123 ₹149

This is 40pcs of each (40 M-M, 40 M-F, 40 F-F) jumper cable Dupont wire for Arduino.
Specifications:
This is 40 pcs of each (total 120 pcs)..
₹159

1 Comment(s)
what type of resistors and how much power supply used in this project pls tell!!!
Leave a Comment