-1060x400h.webp "Temperature & Humidity sensors DHT11 & DHT22")
Hello,
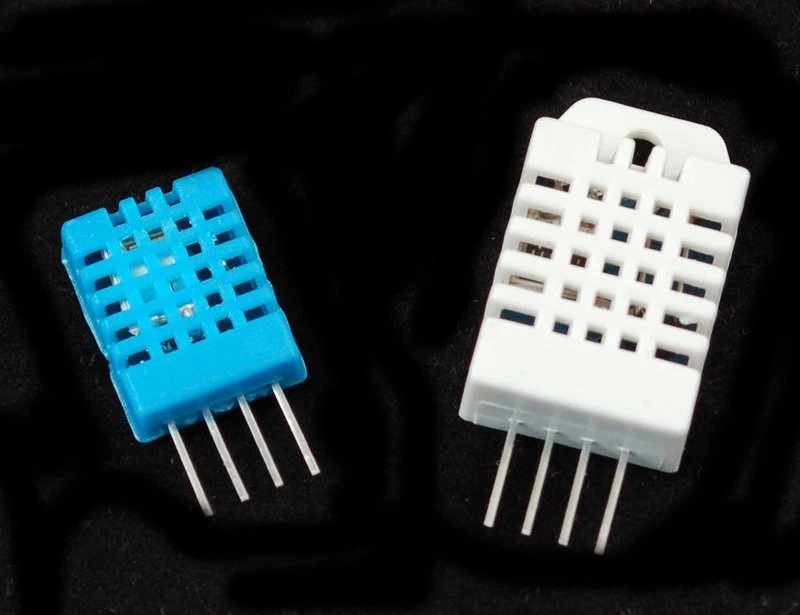
In this tutorial, we are going to learn how to use the temperature sensors DHT series with Arduino board.
These sensors are very popular among robotics and mechatronics projects as they provide great performance and are very cheap.
Hardware Required
Software Required
Sensor Specifications
|
DHT11 |
|
DHT22 |
|
0 - 50 degrees Celsius |
Temperature Range |
-40 - 125 degrees Celsius |
|
20-80% |
Humidity Range |
0-100% |
|
1 Hz (one sample every second) |
Sampling rate |
0.5 Hz (one sample every two seconds) |
|
3-5V |
Operating voltage |
3-5V |
|
2.5mA |
Max current during measuring |
2.5mA |
-
The sensor DHT22 is more expensive because it has better specifications than the DHT11. Although, there are two specifications where the DHT11 is better than the DHT22. First is the sampling rate in which the DHT11 has 1Hz whereas the DHT22 has a 0.5Hz sampling rate.
-
Secondly, the thickness of DHT11 is 5.5mm whereas the thickness of the DHT22 is 7.7mm.
-
The operating voltage and the max operating current are the same for both the sensors.
Working principle of DHT11 & DHT22
-
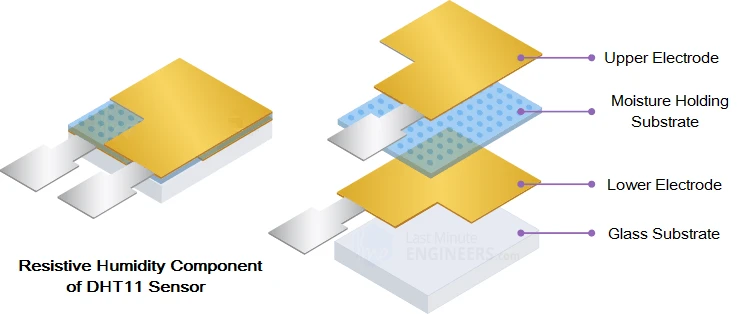
These sensors consist of three main components. They consist of a humidity sensing component, a thermistor, and an integrated chip.
-
There is a humidity sensing component that is used to measure the moisture. The humidity sensing component consists of two electrodes with a humidity sensing substrate in between them.
-
As the moisture in the air changes, the conductivity of the substrate also changes which in turn changes the resistance of the electrodes between them.
-
This change in resistance is read and then converted in terms of data for humidity by the integrated chip. The data is then sent to the Arduino Uno board.
-
The temperature part of it consists of an NTC temperature sensor. It can also be called a thermistor.
-
The thermistor is a variable resistor. The resistance of a thermistor changes with the temperature change. Thermistors are usually made of semiconductor materials to provide large changes in resistance to small changes in temperature.
-
The full form of the term NTC is negative temperature coefficient which means the resistance decreases with an increase in temperature.
-
The changes in temperature and resistance are converted into usable data by the integrated chip.
Interfacing with the DHT11 & DHT22
-
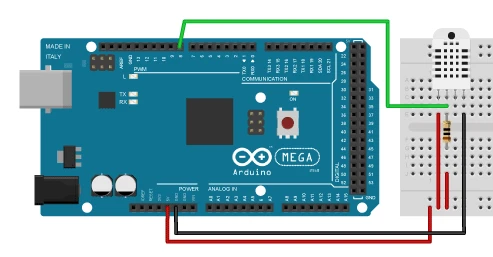
The DHT sensors have 4 pins. GND, VCC, serial data pin, and a pin that has no usage. The DHT sensors have their protocol for transferring data. This requires precise timing diagrams to retrieve the data from the sensors. This diagram can be found on the datasheet of the sensors. Although, we have a DHT Arduino library that takes care of all that so we do not have to look deep in those diagrams.
Arduino code examples
-
First, we need to download and install the DHT library into the Arduino IDE.
-
The first example code is to take both the temperature and humidity data from the DHT sensor and then upload it to the serial monitor via Arduino IDE.
-
Upload this code to the Arduino board. After uploading this code, the temperature and humidity will be shown on the Serial monitor.
-
The next code is for displaying the temperature and humidity on the LCD Display instead of a Serial monitor.


Leave a Comment