27 Dec
-1060x400h.webp "Build a breathalyzer using Arduino")
Hello,
In this tutorial, we are going to learn how to make a breathalyzer using Arduino.
Hardware Required
Software Required
MQ3 Sensor
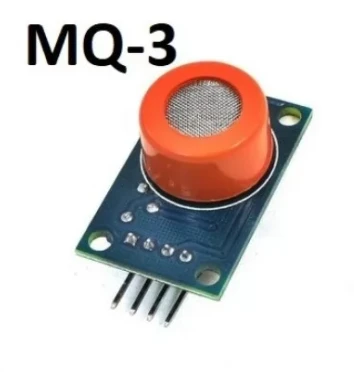
- The MQ3 sensor works on the same principle as the MQ2 smoke sensor. It has a sensing element with six terminals, four output, and two heating terminals.
- It has 4 pins.
- VCC for power supply.
- GND for ground.
- DO for digital output.
- AO for analog output.
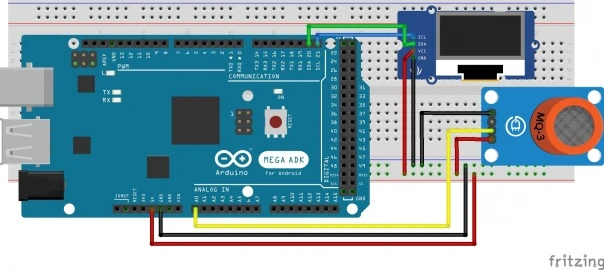
Circuit Diagram
|
Pins on MQ3 Sensor |
Pins on Arduino Mega |
|
VCC |
5V |
|
GND |
GND |
|
AO |
A0 |
|
Pins on OLED |
Pins on Arduino Mega |
|
VCC |
5V |
|
GND |
GND |
|
SDA |
SDA |
|
SCL |
SCL |
Working Concept
- The working concept of this project consists of three components: Arduino board, MQ3 sensor, and the LCD Display.
- First comes the sensing part. Here MQ3 alcohol sensor will sense the amount of alcohol in someone's breath. It then converts this data into output voltage which tells the concentration of the alcohol present.
- These output signals are sent to the Arduino board.
- The Arduino board then converts these signals into suitable signals for the OLED Display and sends them to them via I2C communication.
- The OLED Display shows the alcohol level to the user.
Arduino Code
- Upload the code. Perform the circuit diagram.
Now your breathalyzer is ready for use.

-42 %
The Arduino Mega is a microcontroller board based on the ATmega2560. It has 54 digital input/output pins (of which 14 can be used as PWM outputs), 16 ..
₹1,336 ₹2,299

-32 %
Description:
Tie-point 840
Solderless breadboard (GL-12)
Wire size: Suitable for 29-20 AWG wires
Size: About 16.5*5.6*1cm
Packag..
₹53 ₹78

This is 10pcs of each (10 M-M, 10 M-F, 10 F-F) jumper cable Dupont wire for Arduino.
Specifications:
This is 10 pcs of each (total 30 pcs) ..
₹114

-19 %
This MQ-3 Alcohol Detector Gas Sensor Module is simple to use. MQ-3 Alcohol Detector Module which can sense the presence of Alcohol in the air. It has..
₹104 ₹129

-23 %
OLED (Organic Light-Emitting Diode) is a self-light-emitting technology composed of a thin, multi-layered organic film placed between an anode and cat..
₹229 ₹299

Leave a Comment