08 Mar

0 Comment(s)
2443 View(s)
Hello,
In this tutorial, we are going to set up the SP racing F3 flight controller.
In this tutorial, we are going to set up the SP racing F3 flight controller.
- The SP racing F3 is designed for both entertaining and utility purposes and it gives very high performance in terms of flight. SP F3 gives you all the features be it aerial, photography or FPV racing.
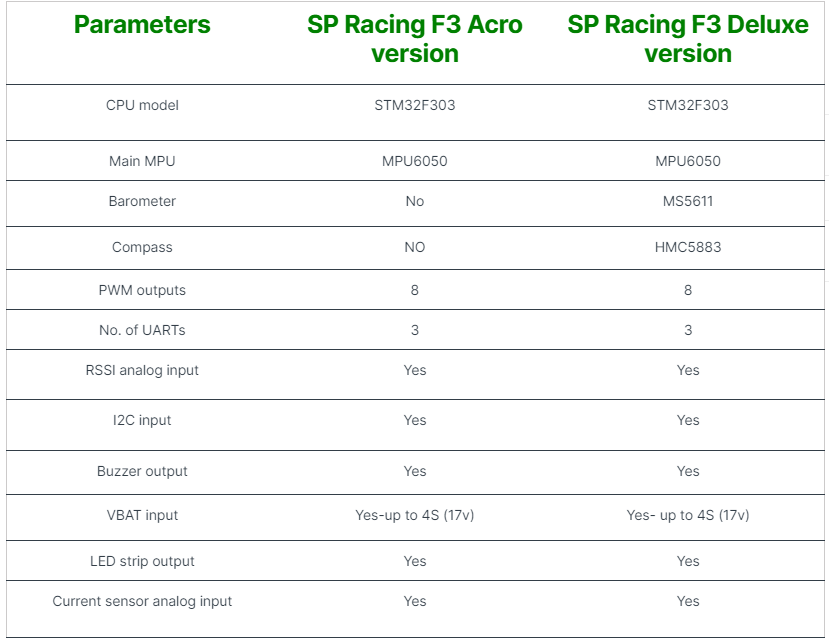
- There are two different versions of SP racing flight controller: SP Racing Acro version, SP Racing Deluxe version.
- Specifications for both the versions are listed below.
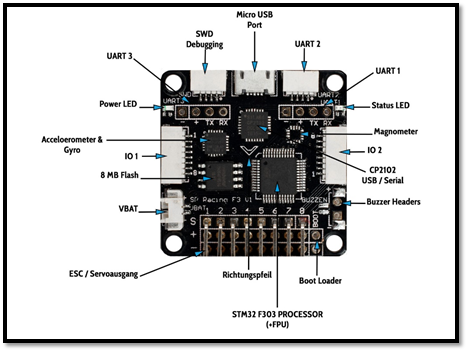
SP Racing Flight controller pinout
- Below picture shows the pinout of the SP Racing F3 flight controller. It includes accelerometer, gyroscope and magnetometer etc.
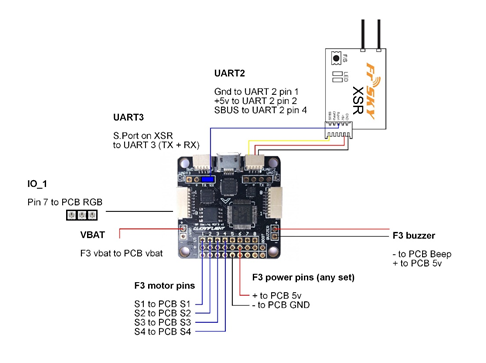
SP Racing connection diagram
- Below is the connection diagram for SP Racing F3 flight controller.
SP Racing Firmware
- SP boards either run on one of the two firmware: Base flight or Clean flight. Both are fairly similar to each other. We will be using Clean flight software for the purpose of this tutorial.
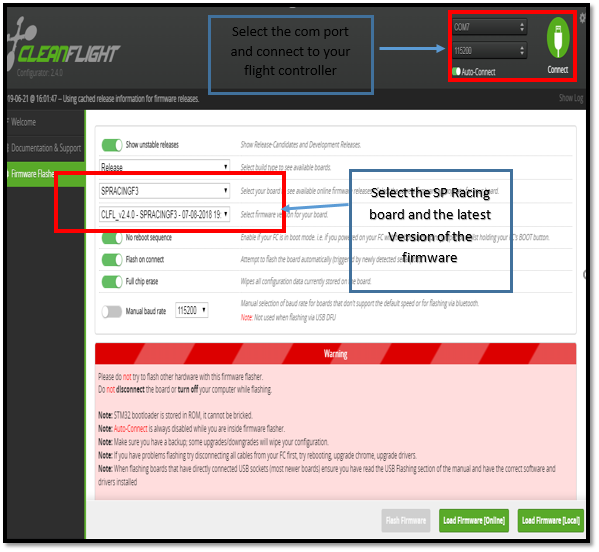
- After installing that software, connect your FC to the computer and browse and select the right COM port. Now select the most updated firmware and click on the Load button.
- The clean flight firmware will be downloaded onto the flight controller now. After this, you will see a 'Flash Firmware' option.
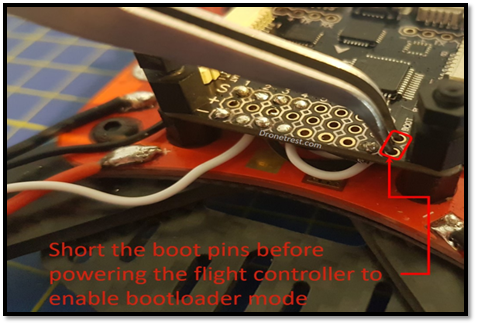
- Now you need to enable bootloader mode. The reason behind enabling the bootloader mode is that the bootloader mode allows the firmware to be flashed on the flight controller.
- After the board is connected to PC in bootloader mode, click on the Flash firmware button. This usually does not work straight away as you need to tweak a few settings.
- First go to the top of the page and select 'Flash on connect' and 'Full chip erase'.
- Unplug and then again plug the board. The software will now automatically try to flash the firmware onto the board.
- If you are still having problems then maybe you should unplug the board again and select 'manual baud rate'. Select a lower baud rate.
- Plug in the board again and hopefully it will start flashing the firmware again.
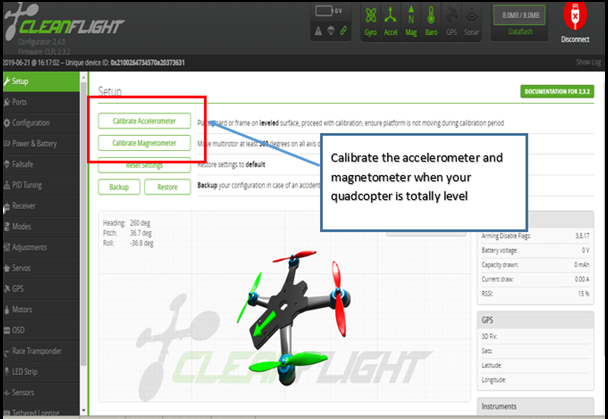
Calibration of Accelerometer and Compass
- Some of the parameters like gyroscope, compass and accelerometer need calibration from time to time. This is very easy on the clean flight software.
- Connect the board to the PC and go to the setup tab. You will see a calibrate accelerometer button.
- Before clicking this, make sure that the drone is put on a flat surface and that there are no vibrations near it. Now click on the calibrate accelerometer button.
Setting up the radio
- We need to make sure that the channels are aligned correctly in order to fly the drone properly. Also make sure that the input range is set between 1000-2000.
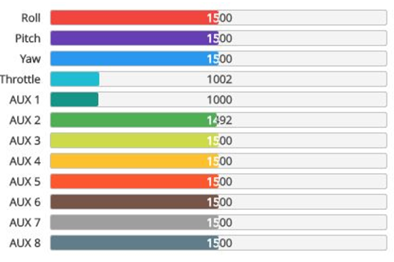
- On the above picture, there are various different channels which are connected to the transmitter. Make sure that any channel is not reversed.
- When you move a stick on the transmitter, the corresponding data should change on the screen. If this does not happen then you may need to change the mapping of the channel.
- Now you flight controller is completely set up.
I hope you learned something about setting up the SP racing F3 flight controller with the clean flight software. I hope you liked it. Thank you.

Leave a Comment