
Hello,
In this tutorial-based article, we are going to learn about pH meters using pH sensors and Arduino.
Hardware Required
Software Required
What is pH?

-
pH is a scale that is used to measure the acidity or basicity of an aqueous solution. The pH scale ranges from 0 to 14. 0 being the most acidic and 14 being the most basic. Pure water is neutral and thus has a PH of 7.
-
pH is the logarithmic scale and it inversely indicates the concentration of hydrogen ions in an aqueous solution.
-
The above mentioned is the formula to calculate the pH of an aqueous solution.
pH meter construction and working principle
-
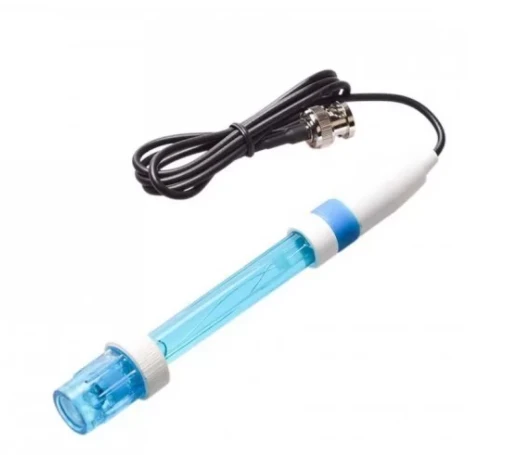
The pH sensor is a cylindrical glass structure that has a bulb situated at the bottom. This bulb is specifically designed to measure hydrogen-ion concentration when dipped in any solution.
-
The hydrogen ions exchange the positively charged ions which are already situated inside the bulb, creating an electrochemical difference.
-
This difference is interpreted by the electronic amplifier situated on the top. It further converts this difference into pH units.
-
The pH meter sends the final pH values to the Arduino board.
-
The Arduino receives those signals and sends the appropriate data to be displayed on the OLED screen.
-
The values at first might not be accurate as the pH meter needs to be in the solution for a while to have the proper pH values.
Circuit Diagram
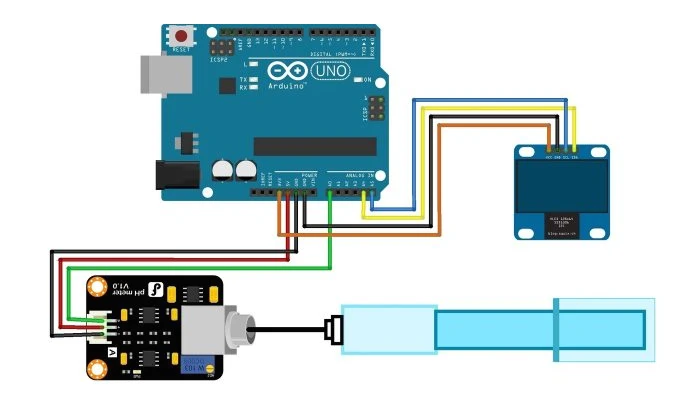
- The pin connections for the circuit diagram are mentioned in the table below:
|
Pins on Arduino |
Pins on pH sensor |
|
5V |
VCC |
|
GND |
GND |
|
A0 |
Signal pin |
|
Pins on Arduino |
Pins on OLED Display |
|
3.3V |
VCC |
|
GND |
GND |
|
A4 |
SDA |
|
A5 |
SCL |
Arduino Code
-
Copy the Arduino code and upload it to your board via Arduino IDE.
Testing the code
- We took 4 different solutions and tested the pH meter with them

- Testing it with highly acidic lemon water.

Your pH meter is ready to use.


(Restock: 24-07-2026 to 28-07-2026)


Leave a Comment