
With the Arduino Esplora Development Board, the possibilities are essentially endless. Arduino has always been associated with creativity and innovation. Whether you're a first-time maker or a seasoned pro, this adaptable board is made to inspire your imagination and elevate your projects. Explore the world of Arduino Esplora and discover what makes it unique.
Introducing the Arduino Esplora
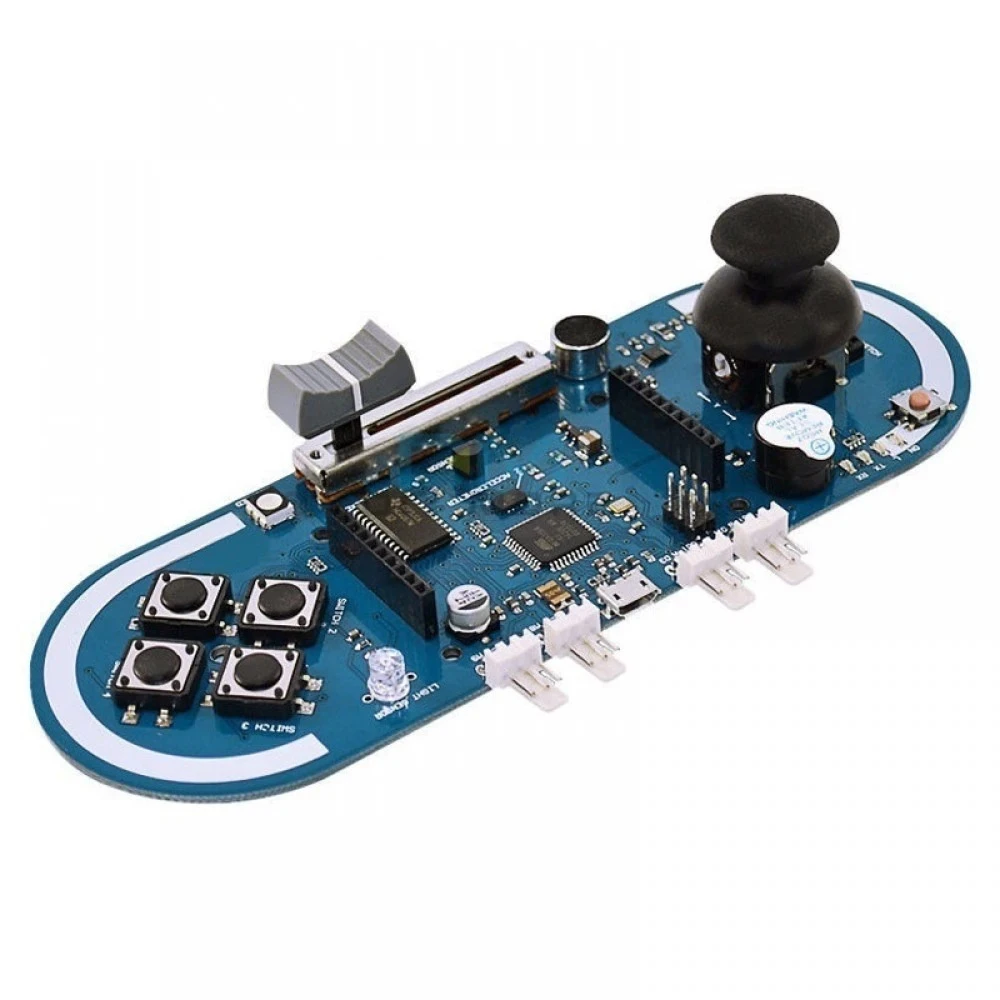
The Arduino Esplora is a unique and user-friendly microcontroller board designed for those who want to explore the world of electronics, programming, and physical interaction. What sets it apart is its built-in sensors and components, making it an ideal choice for experimenting with a wide range of interactive projects.
Key Features
The Arduino Esplora comes equipped with the following features:
- Built-In Sensors: It includes a variety of sensors, such as a joystick, a linear potentiometer, a temperature sensor, a microphone, and a light sensor. These sensors allow you to create projects that respond to physical inputs and environmental conditions.
- Plug-and-Play: No need for external components or soldering. The Esplora is ready to use right out of the box, making it a hassle-free choice for beginners.
- Color LCD: The onboard color LCD screen provides a visual interface for your projects, allowing you to display data, graphics, and even games.
- Tons of I/O Pins: In addition to its built-in components, the Esplora has plenty of digital and analog pins, enabling you to connect additional sensors and actuators.
Getting Started
To begin your journey with the Arduino Esplora, follow these simple steps:
- Unbox and Assemble: Open the package and take out your Esplora board. No assembly is required; everything you need is onboard.
- Install the Arduino IDE: If you haven't already, download and install the Arduino Integrated Development Environment (IDE) from the Arduino website.
- Connect Your Esplora: Plug the Esplora into your computer via a USB cable.
- Select the Board: In the Arduino IDE, choose the "Arduino Esplora" board from the
Tools > Boardmenu. - Write and Upload Code: Start by experimenting with the built-in components. For example, you can create a simple game using the joystick and display it on the color LCD. Arduino provides a wide range of example sketches to help you get started.
- Explore and Experiment: Once you're comfortable with the built-in sensors and components, consider adding external sensors, LEDs, or servos to create more complex projects.
Projects and Inspiration
The Arduino Esplora opens the door to numerous creative projects. Here are a few ideas to spark your imagination:
- Design a motion-controlled video game using the joystick.
- Create an ambient light monitor that adjusts the room's lighting based on the detected light levels.
- Build a musical instrument that responds to the microphone's input.
- Develop a temperature and humidity data logger with the onboard temperature sensor.
Where to Learn More
To continue your exploration with the Arduino Esplora, consider these resources:
- Check out the Arduino Esplora page for more information and tutorials.
- Explore the official Arduino forum and the Arduino community for project ideas and support.
There are countless opportunities available with the Arduino Esplora. This adaptable board is a great option for anyone with a creative spark, whether they want to learn, experiment, or create something completely new.
With your Arduino Esplora, what project are you going to work on today? Have fun experimenting!

Leave a Comment