
A logic level converter might be required if you're working on electronic projects that require connecting components with different voltage levels. The 2-Channel Logic Level Converter Module is one popular remedy for this. We will examine what it is and how to use it in this guide.
What is a Logic Level Converter Module?
A tiny electronic part called a logic level converter module lets you change the voltage levels in various circuit components. When connecting parts that run at different voltage levels, like 3.3V and 5V, it's extremely helpful.
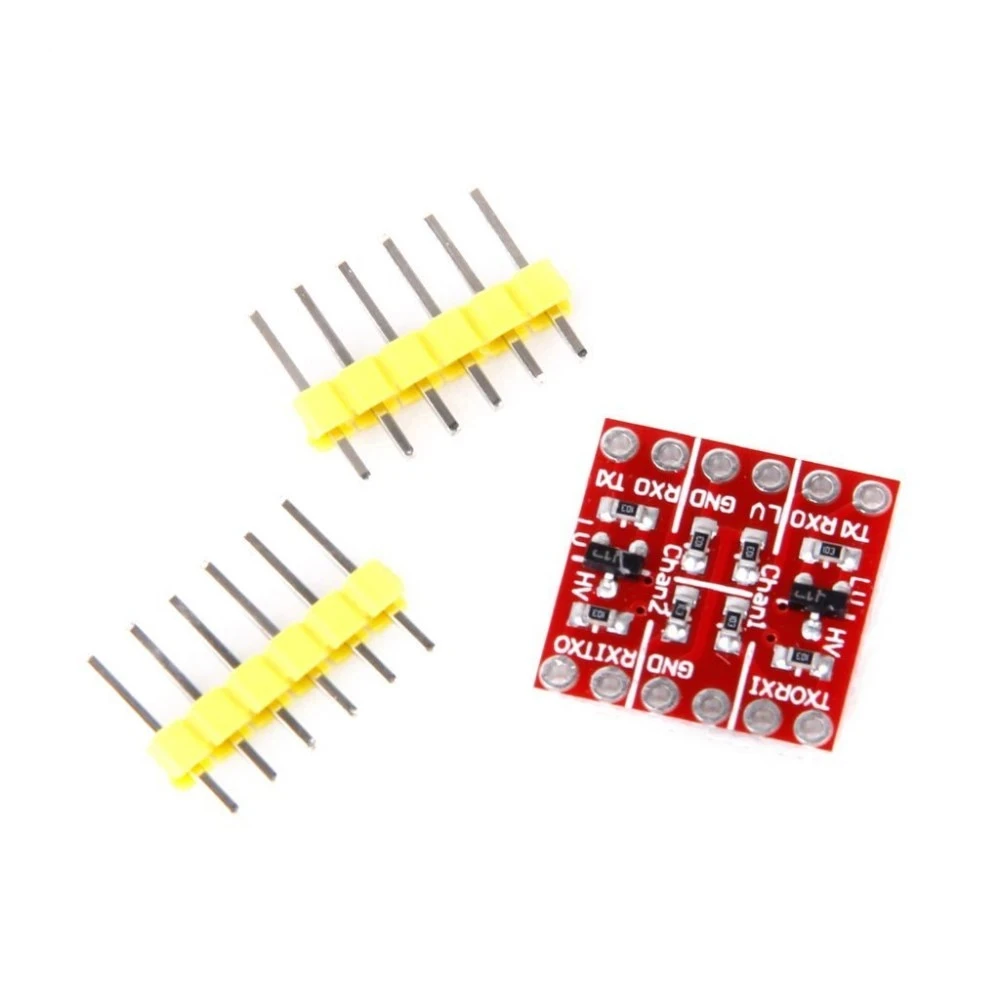
Specifically, the 2-Channel Logic Level Converter Module is perfect for many simple projects because it can convert signals between two voltage levels. It functions as a bridge to enable appropriate communication between the two voltages, usually having two sides: one for the high voltage (such as 5V) and another for the low voltage (such as 3.3V).
How to Use a 2-Channel Logic Level Converter Module
Using the 2-Channel Logic Level Converter Module is quite straightforward. Here's a step-by-step guide:
You Will Need:
- 2-Channel Logic Level Converter Module
- Components operating at different voltage levels (e.g., 3.3V and 5V)
- Jumper wires
- Breadboard (optional)
Steps:
-
Identify the Voltage Levels: Determine which side of the module corresponds to your lower voltage (e.g., 3.3V) and which side corresponds to your higher voltage (e.g., 5V).
-
Connect the Low Voltage Side: Connect the low voltage side of your components (e.g., 3.3V) to the "LV" (Low Voltage) side of the module. Use jumper wires to make the connections. You may need to use a breadboard if you're working with multiple components.
-
Connect the High Voltage Side: Connect the high voltage side of your components (e.g., 5V) to the "HV" (High Voltage) side of the module in a similar manner.
-
Ground Connection: Don't forget to connect the ground (GND) of both your low voltage and high voltage components to a common ground (GND) on the module.
-
Verify Connections: Double-check your connections to ensure they are secure and properly configured.
-
Test Your Circuit: Power up your circuit and test the communication between the components operating at different voltage levels. The logic level converter module should ensure that the signals are correctly translated.
That's it! You've successfully used the 2-Channel Logic Level Converter Module to enable communication between components with different voltage levels.
When to Use a Logic Level Converter
You should consider using a logic level converter in your projects when:
- You need to interface components that operate at different voltage levels.
- Directly connecting components with mismatched voltage levels could damage them.
- Your microcontroller or sensor operates at a voltage level that differs from your main circuit.
By using a logic level converter, you can safely and effectively bridge the gap between these components, allowing your projects to function as intended.
Conclusion
For many electronics projects, the 2-Channel Logic Level Converter Module is an essential yet straightforward part. You can use it to make sure that there are no voltage level problems and that the various components of your circuit communicate with each other. Regardless of your level of experience as a maker, being able to comprehend and operate this module is an important electronics skill.
Enjoy playing around and tweaking with your 2-Channel Logic Level Converter Module!


Leave a Comment