
Wemos D1 R2 ESP8266 WiFi UNO Development Board is a great option if you want to explore the world of IoT and wireless communication. To help you get started on your Internet of Things projects, we'll take you through the fundamentals of this small yet mighty board in this guide.
What is the Wemos D1 R2?
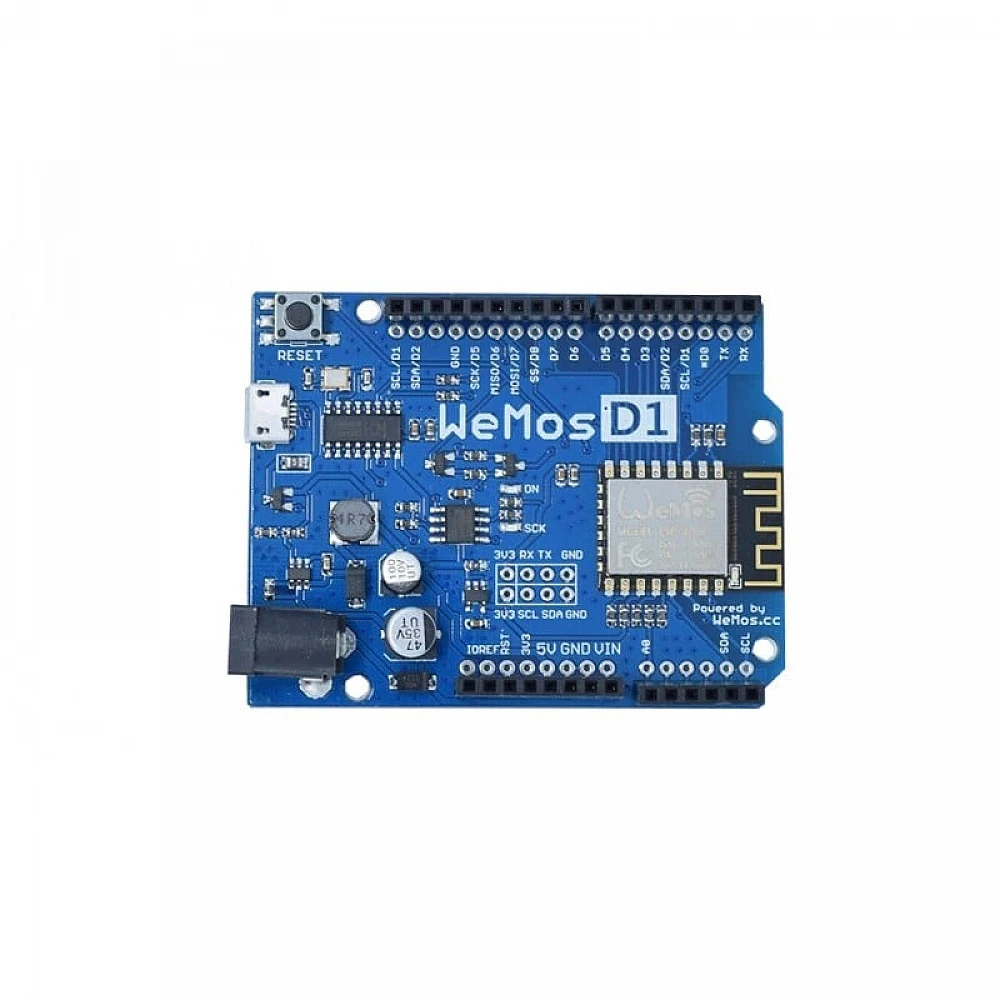
A development board based on the ESP8266 WiFi module is called the Wemos D1 R2. It combines the flexibility and connectivity of the ESP8266 with the user-friendliness of the Arduino platform. It is therefore the best option for projects involving sensor networks, IoT applications, and wireless communication.
Getting Started
1. Hardware Setup:
- Connect the Wemos D1 R2 to your computer using a micro-USB cable.
- Install the necessary USB drivers if prompted.
2. Install Arduino IDE:
- Download and install the Arduino IDE from the official Arduino website.
- Open the Arduino IDE and navigate to
File > Preferences. In the "Additional Boards Manager URLs" field, add the following URL:http://arduino.esp8266.com/stable/package_esp8266com_index.json. - Go to
Tools > Board > Boards Manager, search for "esp8266" and install the board package.
3. Select Board and Port:
- In the Arduino IDE, go to
Tools > Boardand select "Wemos D1 R2 & Mini." - Choose the correct port under
Tools > Port.
4. Blinking LED Example:
- Open the "Blink" example sketch from
File > Examples > 01.Basics > Blink. - Customize the code if you wish.
- Upload the sketch to the Wemos D1 R2 by clicking the right-arrow icon.
5. Explore WiFi Connectivity:
- Use the built-in WiFi capabilities of the Wemos D1 R2 to connect to your local WiFi network.
- Modify the example sketches related to WiFi connectivity to understand the basics of wireless communication.
Experimenting with Sensors
The real power of the Wemos D1 R2 lies in its ability to connect to the internet and interact with various sensors. Here are a few project ideas to spark your creativity:
-
Temperature and Humidity Monitor:
- Connect a DHT11 or DHT22 sensor to measure temperature and humidity.
- Upload the sensor data to a cloud platform like ThingSpeak.
-
Smart Home Automation:
- Control home appliances using relays and create a web interface to manage them remotely.
-
Weather Station:
- Use a weather sensor (such as BMP180) to gather atmospheric pressure and temperature data.
- Display the information on a web server hosted by the Wemos D1 R2.
Resources for Further Learning
To deepen your understanding of the Wemos D1 R2 and the ESP8266, consider exploring the following resources:
- The Wemos official documentation provides detailed information about the board.
- The ESP8266 Community Forum is a valuable platform for troubleshooting and getting help.
- Various online tutorials and project examples can be found on platforms like GitHub and Instructables.
Never forget that doing is the best way to learn. Ascend to more complex applications by starting with simpler projects. With its versatility, the Wemos D1 R2 board opens up a world of possibilities for Internet of Things applications and connected devices.
Happy tinkering with your Wemos D1 R2! ?


Leave a Comment