
The UNO R3 ESP8266 Serial Board is the solution you've been waiting for if you love Arduino Uno, Mega, or other similar boards and you've been missing WiFi connectivity in your projects. With built-in WiFi support, this small and strong board easily integrates with your favorite Arduino boards to increase their functionality. Let's explore what makes this board unique and how to use it.
What is UNO R3 ESP8266 Serial Board?
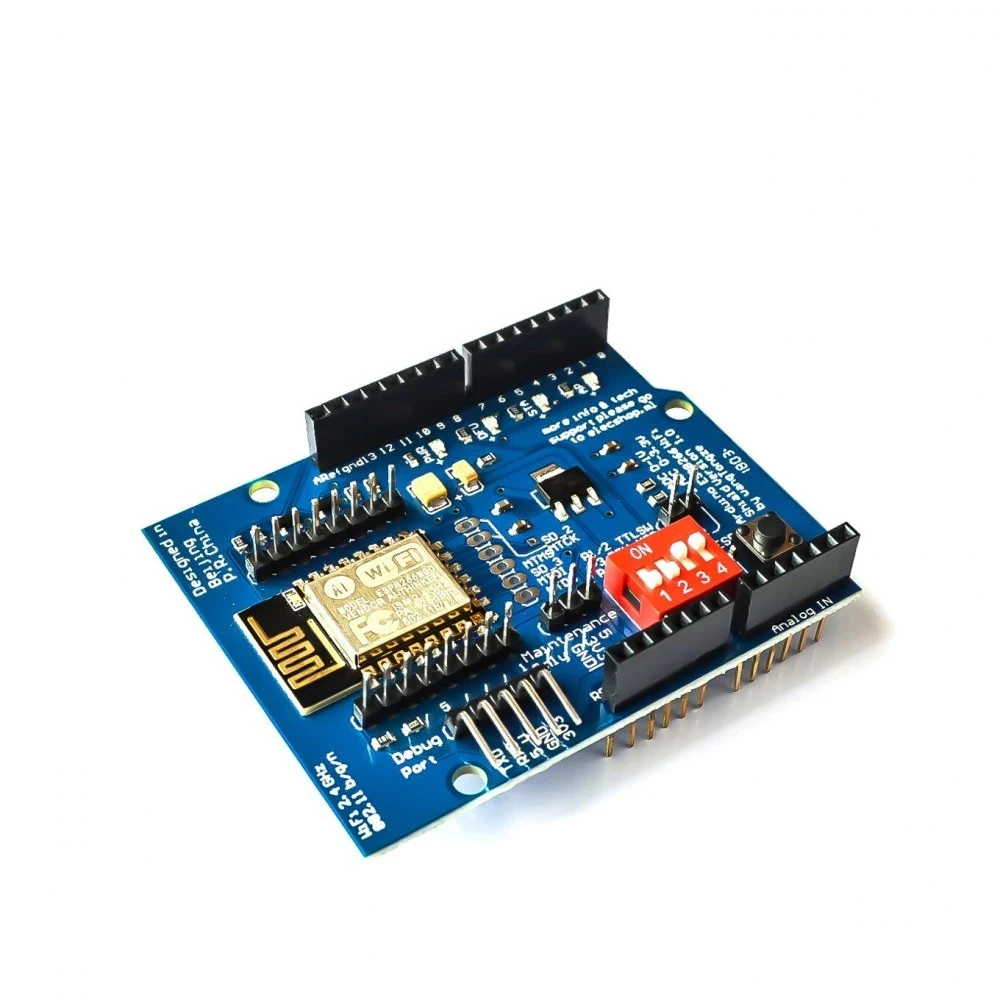
With the UNO R3 ESP8266 Serial Board, you can extend your Arduino projects to include WiFi capabilities. The Arduino Uno, Mega, and other boards that follow standard pin interface spacing are fully compatible with it. This implies that there is no complicated wiring or modification required for you to simply plug it into your current projects.
Key Features:
-
ESP8266 WiFi Module: The heart of the board is the ESP8266 WiFi module, providing seamless wireless communication capabilities.
-
Standard Pin Interface: The board follows the standard pin interface spacing, making it a breeze to connect with Arduino Uno, Mega, and similar boards.
-
GPIO Expansion: With additional GPIO pins, you have more room for connecting sensors, actuators, or other components to enhance your projects.
How to Use UNO R3 ESP8266 Serial Board:
Step 1: Hardware Setup
-
Prepare Your Arduino Board: Whether you're using Arduino Uno or Mega, ensure it is powered off.
-
Connect the UNO R3 ESP8266 Board: Plug the UNO R3 ESP8266 board into your Arduino board using the standard pin interface.
Step 2: Software Configuration
-
Install the ESP8266 Board Package:
- Open Arduino IDE and go to
File > Preferences. - Enter the following URL in the Additional Boards Manager URLs:
http://arduino.esp8266.com/stable/package_esp8266com_index.json. - Open the Boards Manager from
Tools > Board > Boards Managerand search for "esp8266." Install the ESP8266 board package.
- Open Arduino IDE and go to
-
Select Board and Port:
- In Arduino IDE, go to
Tools > Boardand select the appropriate ESP8266 board (e.g., NodeMCU 1.0). - Choose the port under
Tools > Port.
- In Arduino IDE, go to
Step 3: Upload Your Sketch
Write your Arduino sketch, making use of the ESP8266WiFi library for WiFi functionality. For example, a simple sketch to connect to a WiFi network would look like this:
1 2 3 4 5 6 7 8 9 10 11 12 13 14 15 16 17 18 | #include <ESP8266WiFi.h> const char* ssid = "YourSSID"; const char* password = "YourPassword"; void setup() { Serial.begin(115200); WiFi.begin(ssid, password); while (WiFi.status() != WL_CONNECTED) { delay(1000); Serial.println("Connecting to WiFi..."); } Serial.println("Connected to WiFi"); } void loop() { // Your code here } |
Step 4: Upload and Run
Click the Upload button in Arduino IDE to compile and upload your sketch to the Arduino with the attached UNO R3 ESP8266 board. Open the Serial Monitor to view the output.
Best wishes! You've successfully used the UNO R3 ESP8266 Serial Board to add WiFi functionality to your Arduino project. You can now explore the possibilities for remote monitoring, IoT projects, and more.


Leave a Comment