
A great place to start if you're interested in exploring the fascinating field of motion sensing and control is with the MPU-6050 6DOF (Degrees of Freedom) sensor module. We'll go over the fundamentals of the MPU-6050 and how to use it with an Arduino for basic motion-based projects in this brief tutorial.
What is MPU-6050?
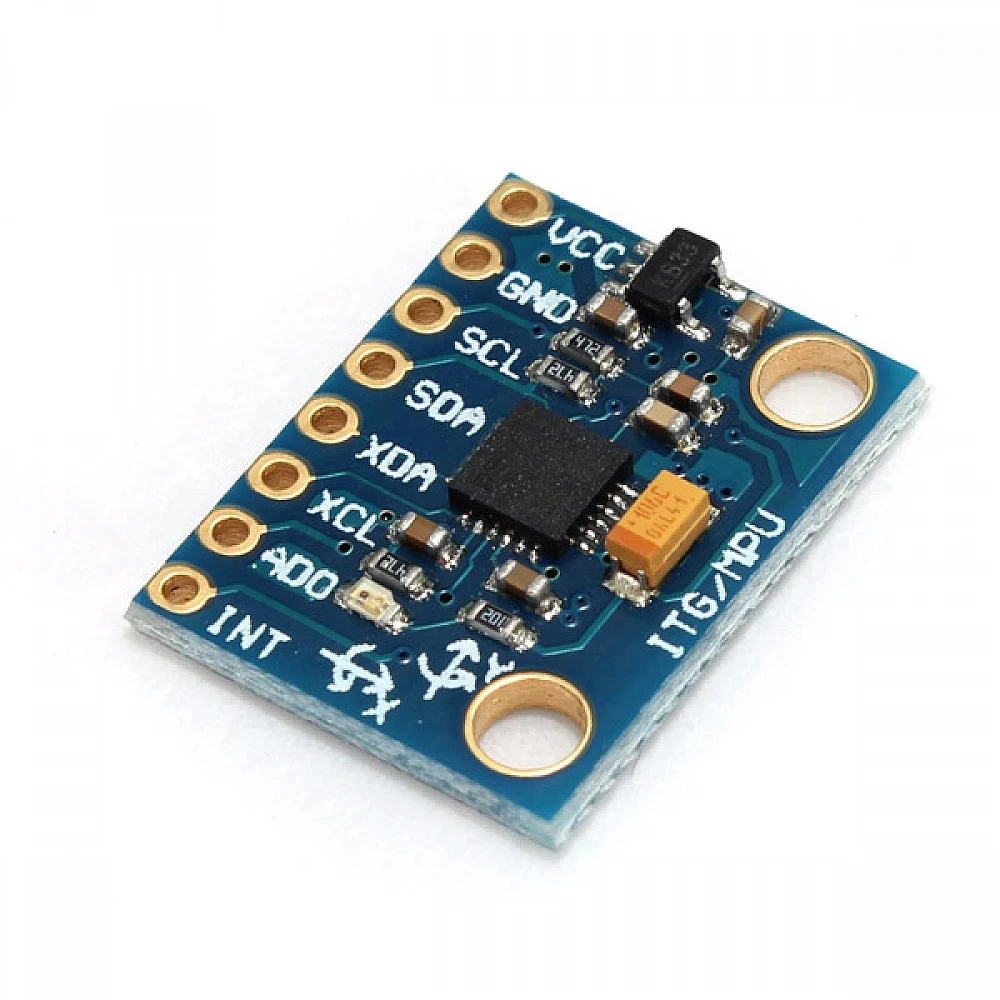
With the integration of a 3-axis accelerometer and a 3-axis gyroscope onto a single chip, the MPU-6050 is a 6-axis motion-tracking device. Because it can provide precise motion data, this small module is perfect for motion-based projects, gaming controllers, robotics, and other applications.
Getting Started
Components Needed:
- Arduino Board (e.g., Arduino Uno)
- MPU-6050 6DOF Sensor Module
- Breadboard and Jumper Wires
Wiring:
Connect the MPU-6050 to your Arduino as follows:
- VCC to 5V on Arduino
- GND to GND on Arduino
- SDA to A4 on Arduino
- SCL to A5 on Arduino
Installing Necessary Libraries:
Open the Arduino IDE and go to Sketch > Include Library > Manage Libraries. Search for "MPU6050," and install the library by Jeff Rowberg.
Simple Code to Read Data
Here's a basic Arduino sketch to get readings from the MPU-6050:
This code reads and prints accelerometer and gyroscope data from the MPU-6050. Upload the code to your Arduino and open the Serial Monitor (Tools > Serial Monitor) to see the data.
Experimenting Further
Now that you can read data from the MPU-6050, you can start experimenting with different projects:
- Gesture Control: Use the accelerometer data to detect specific hand gestures.
- Balancing Robot: Implement a simple two-wheeled balancing robot using the gyro data.
- 3D Motion Tracking: Explore the gyroscope data to track the orientation of an object in 3D space.
Recall that this is only the start. For motion-based projects, the MPU-6050 opens up a world of possibilities. Enjoy your experiments as you learn more about this sensor's fascinating possibilities!


Leave a Comment